Pilnīgs ceļvedis par kaņepju audzēšanu telpās (vides apstākļi, telpa, smaržu kontrole un optimizācija)
jūnijs
Kannaabisa audzēšana telpās galvenokārt ir saistīta ar kontroli. Atšķirībā no audzēšanas brīvā dabā, kur auga attīstību nosaka laika apstākļi un sezonas maiņa, telpu audzētāji visu vidi veido no nulles. Apgaismojums, gaisa plūsma, mitrums, temperatūra, barības vielas un pat smaržu kontrole – visi šie faktori kopā ietekmē to, cik veselīgs izaugs kannabisa augs un cik ražīga būs galīgā raža.
Daudziem audzētājiem iekštelpu audzēšanas pievilcība slēpjas tās stabilitātē. Pareizi organizēta iekštelpu sistēma ļauj kaņepju augiem attīstīties stabilos apstākļos visa gada garumā, nodrošinot blīvas ziedkopas, spēcīgākus terpeņu profilus un prognozējamākus ražošanas rādītājus. Neatkarīgi no tā, vai izmantojat pilnībā aprīkotu audzēšanas telti, pārveidojat skapīti par audzēšanas telpu vai audzējat diskrēti dzīvoklī, smaržas kontrole bieži vien ir viena no lielākajām iekštelpu audzētāju bažām.
Šajā rokasgrāmatā ir aprakstītas galvenās sistēmas, kas saistītas ar kaņepju audzēšanu telpās, tostarp vides pārvaldība, audzēšanas telts, smaržu kontrole, telpas taupīšanas paņēmieni, lapotnes kopšana un augšanas optimizācijas stratēģijas.
Iekštelpu kaņepju audzēšanas sistēmu izpratne
Kannaabisa audzēšanu telpās vislabāk var uzskatīt par kontrolētu ekosistēmu. Katrs aprīkojuma elements audzēšanas telpā ietekmē to, cik efektīvi augs veic fotosintēzi, uzsūc barības vielas un ražo kanabinoīdus un terpenus.
Lielākā daļa telpu audzētāju izmanto slēgtas sistēmas, piemēram, audzēšanas teltis vai hermētiskas audzēšanas telpas, jo tās ļauj daudz efektīvāk kontrolēt vides faktorus nekā atklātās telpās. Atstarojošās sienas uzlabo gaismas sadali, ventilācijas sistēmas regulē gaisa plūsmu, bet filtrēšanas sistēmas palīdz stabilizēt mitruma un smaržu līmeni.
Galvenie vides faktori, kas ietekmē augu veselību, ir šādi:
- Temperatūras stabilitāte
- Relatīvā mitruma regulēšana
- Gaisa plūsma un gaisa apmaiņa
- Apgaismojuma intensitāte un fotoperiodi
- Sakņu zonas mitrums un skābekļa pieplūde
- CO₂ pieejamība fotosintēzes laikā
Ja šīs sistēmas darbojas stabili, kaņepju augi var veltīt vairāk enerģijas auguma attīstībai un sveķu veidošanai, nevis stresa pārvarēšanai.
Daudzi iesācēji audzētāji nenovērtē, cik cieši šie faktori ir savstarpēji saistīti. Piemēram, palielinot gaismas intensitāti, bieži paaugstinās temperatūra, kas savukārt ietekmē mitruma līmeni un augu transpirācijas intensitāti. Pieredzējuši audzētāji zina, ka telpu audzēšanā svarīgākais nav vienas konkrētas vērtības maksimizēšana, bet gan visu faktoru savstarpējais līdzsvars.
Kaņepju augšanas posmi un vides prasības
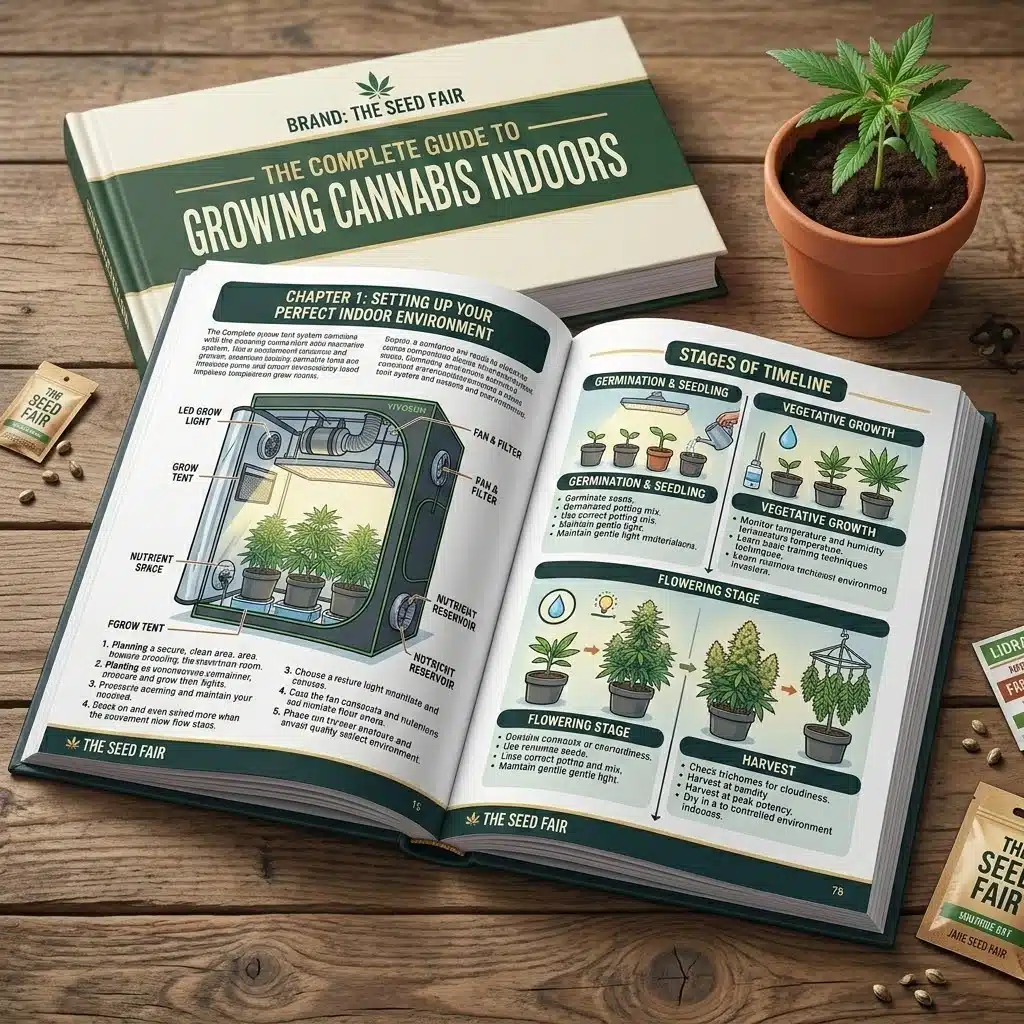
Kaņepju augi iziet vairākas atšķirīgas augšanas fāzes, un katram posmam nepieciešama atšķirīga pieeja vides apstākļu nodrošināšanā. Apstākļi, kas ir piemēroti veģetācijas periodā, ziedēšanas laikā var kļūt kaitīgi.
Šo pāreju izpratne ir viena no galvenajām atšķirībām starp vidusmēra telpu audzētājiem un tiem, kas gūst lielus panākumus.
Stādu posms (iesakņošanās fāze)
Stādi pirmajās augšanas nedēļās ir ārkārtīgi jutīgi. Šajā posmā sakņu sistēma vēl attīstās, tādēļ augs, lai izdzīvotu, ir ļoti atkarīgs no ārējā mitruma un stabila siltuma.
Lielākā daļa audzētāju šajā posmā uztur nedaudz augstāku temperatūru un lielāku mitrumu, lai mazinātu stresu jaunajām saknēm.
Galvenās prioritātes stādu audzēšanas posmā ir šādas:
- Augsts mitruma līmenis, kas veicina mitrināšanu
- Maigas, stabilas temperatūras
- Maigs gaisa plūsmas režīms, lai novērstu sēklu puvi
- Maigs apgaismojums, kas novērš pārmērīgu siltuma radītu stresu
Viena no bieži sastopamajām kļūdām, ko pieļauj jaunie audzētāji, ir pārāk intensīva apgaismojuma izmantošana pārāk agrīnā posmā. Jaunie kaņepju stādi augšanas sākuma posmā nav pakļaujami pārāk spēcīgai gaismas iedarbībai. Pārmērīgs karstums vai zems gaisa mitrums var ātri izžūt stādus un kavēt to agrīno attīstību.
Veģetatīvā stadija (struktūras attīstība)
Veģetatīvajā posmā kaņepju augi veido savu struktūru. Šajā posmā saknes strauji aug, stumbri nostiprinās un attīstās lielas vēdekļveida lapas, kas nodrošina fotosintēzi.
Veselīga veģetatīvā augšana parasti nodrošina labākus ziedēšanas rezultātus vēlāk, jo augs izveido spēcīgāku karkasu, kas spēj noturēt smagus ziedkopas.
Galvenās prioritātes veģetācijas jomā ir šādas:
- Spēcīga gaismas iedarbība fotosintēzes nodrošināšanai
- Barības vielu papildinājums ar augstu slāpekļa saturu
- Vienmērīga gaisa plūsma stumbra izturības nodrošināšanai
- Stabilas laistīšanas metodes
- Sakņu zonas skābekļa piegāde
Šis ir arī posms, kurā daudzi audzētāji sāk izmantot augu veidošanas metodes, piemēram, galotņu apgriešanu, zema stresa veidošanu (LST) vai ScrOG sistēmas. Šīs metodes uzlabo lapotnes izkliedēšanu un palīdz telpu audzētājiem maksimāli izmantot ierobežoto vertikālo telpu.
Augšanas periodā ļoti svarīga ir stabila vides vide. Lielas temperatūras svārstības vai nestabils mitruma līmenis var palēnināt augšanu un samazināt augu vispārējo vitalitāti. Audzētāji, kas vēlas panākt ātrāku attīstību, bieži vien koncentrējas uz stabilas dienas temperatūras uzturēšanu, vienlaikus izvairoties no pārmērīga temperatūras pazemināšanās naktī.
Ziedēšanas posms (ziedpumpuru veidošanās)
Ziedēšana ir visjutīgākais posms telpu audzēšanas ciklā. Tiklīdz kaņepju augi sāk veidot ziedus, kļūdas vides apstākļu nodrošināšanā kļūst ievērojami dārgākas.
Augsts mitruma līmenis, slikta gaisa cirkulācija vai pārmērīgs karstums ziedēšanas laikā var izraisīt pelējuma veidošanos, ziedkopu puvi, terpeņu noārdīšanos un kanabinoīdu ražošanas samazināšanos. Tas jo īpaši attiecas uz blīviem lapotnēm, kur starp ziedkopām uzkrājas nekustīgs gaiss.
Galvenās prioritātes ziedēšanas jomā ir šādas:
- Samaziniet gaisa mitrumu, lai novērstu pelējuma veidošanos
- Stabilas temperatūras, lai mazinātu stresa reakcijas
- Spēcīga gaisa plūsma visā kupola telpā
- Vienmērīgs apgaismojuma režīms (12/12 cikls)
- Pareiza barības vielu pāreja uz fosforu un kāliju
Lielākā daļa audzētāju novēro, ka ziedēšanas laikā kaņepju aromāts kļūst daudz spēcīgāks, jo palielinās terpeņu ražošana. Tāpēc smaržu kontroles sistēmas kļūst īpaši svarīgas audzēšanas pēdējās stadijās.
Tuvojoties ražas laikam, daudzi audzētāji nedaudz pazemina nakts temperatūru, lai veicinātu sveķu veidošanos un terpeņu saglabāšanu.
Audzēšanas telšu sistēmas un kontrolēta iekštelpu vide
Audzēšanas teltis ir kļuvušas par standarta pamatu kaņepju audzēšanai telpās, jo tās rada pilnībā kontrolējamu mikroklimatu.
Mazākās telpās, piemēram, dzīvokļos un skapjos ierīkotās audzētavās, bieži izmanto kompakta izmēra audzēšanas telšu sistēmas, lai ierobežotā telpā nodrošinātu maksimālu vides kontroli.
Atšķirībā no atklātām telpām, audzēšanas teltis izolē vides faktorus atstarojušā, hermētiski noslēgtā telpā. Tas ļauj audzētājiem daudz efektīvāk regulēt apgaismojumu, mitrumu, gaisa plūsmu un smaržu.
Mūsdienu audzēšanas teltīs parasti ir:
- Interjers ar atstarojošu mylaru
- Ventilācijas atveres
- Apgaismojuma sistēmu balsti
- Gaismas necaurlaidīgas rāvējslēdzējas un vīles
- Telpa filtrēšanas un gaisa plūsmas iekārtām
Atstarojošā iekšējā apdare palīdz vienmērīgi izkliedēt gaismu pa visu kupolu, uzlabojot fotosintēzes efektivitāti un vienlaikus samazinot enerģijas zudumu.
Audzēšanas telšu sistēmu priekšrocības ir šādas:
- Labāka klimata stabilitāte
- Uzlabota smaržu neizplatīšanās
- Uzlabota gaismas efektivitāte
- Kaitēkļu un piesārņojuma samazināšana
- Vienkāršāka vides pārvaldība
- Lielāka rīcības brīvība attiecībā uz audzēšanu telpās
Audzēšanas teltis ir īpaši noderīgas dzīvokļu audzētājiem un tiem, kam ir maz vietas, jo tās ļauj visus vides kontroles elementus koncentrēt vienā slēgtā telpā.
Daudzi pieredzējuši audzētāji galu galā atklāj, ka vides stabilitāte ir svarīgāka par telpas lielumu. Mazs, labi apsaimniekots audzēšanas telts bieži vien sniedz labākus rezultātus nekā lielākas, nekontrolētas audzēšanas telpas.
Kā audzēt marihuānu telpās bez smaržas
Smaržu neitralizēšana ir viens no svarīgākajiem aspektiem, audzējot kaņepes telpās, jo īpaši dzīvokļos, kopmītnēs vai blīvi apdzīvotos rajonos.
Modernas filtrēšanas sistēmas, gaisa plūsma ar negatīvu spiedienu un hermētiski noslēgtas telpas kļūst īpaši svarīgas, ja vēlas iemācīties audzēt marihuānu telpās bez smaržas.
Spēcīgā kaņepju smarža galvenokārt rodas no terpeņu savienojumiem, piemēram, mircēna, limonēna, pinenes un kariofilēna. Šo aromātisko savienojumu koncentrācija ziedēšanas laikā palielinās, jo pastiprinās sveķu veidošanās.
Ja nav nodrošināta pienācīga gaisa cirkulācija un filtrēšana, kaņepju smarža var izplatīties pārsteidzoši tālu ārpus audzēšanas telpas.
Kāpēc smaržu neitralizēšana ir svarīga
Efektīva smaku kontrole ir svarīga vairāku iemeslu dēļ:
- Nevēlamas uzmanības novēršana
- Diskrētuma ievērošana dzīvojamos rajonos
- Kaimiņu sūdzību skaita samazināšana
- Veselīgāku gaisa cirkulācijas sistēmu veicināšana
- Vides stabilitātes uzlabošana kopumā
Daudzos gadījumos spēcīgas, ilgstošas smakas ir arī pazīmes, kas liecina par sliktu ventilāciju vai nepietiekamu gaisa apmaiņu audzēšanas telpās.
Primārās smaržu neitralizēšanas sistēmas
Lielākā daļa telpu audzētāju izmanto gaisa plūsmas regulēšanas un filtrēšanas sistēmu kombināciju, lai efektīvi samazinātu kaņepju smaržu.
Visbiežāk izmantotie līdzekļi smaržu neitralizēšanai ir:
- Aktīvās ogles filtri
- Iebūvēti izplūdes ventilatori
- Negatīvā spiediena ventilācijas sistēmas
- Aizvērtas audzēšanas teltis vai slēgtas telpas
- Smaržu neitralizatori, kas novietoti ārpus audzēšanas telpām
Filtrēšana ar aktivēto ogli joprojām ir nozares standarts, jo tā fiziski aiztur gaisā esošās terpeņu molekulas, pirms tās izkļūst no audzēšanas telpas.
Tikpat svarīga ir arī pareiza gaisa cirkulācija. Izplūdes sistēmām ir nepārtraukti jāizvada silts, smaržīgs gaiss, vienlaikus ieplūdinot svaigu gaisu. Ja audzēšanas teltī tiek uzturēts negatīvs spiediens, nefiltrētas smakas daudz retāk izkļūst ārā.
Daudzi audzētāji arī atklāj, ka stabila temperatūra un mitrums dabiski samazina smaržas intensitāti, uzlabojot kopējo vides līdzsvaru.
Kaņepju audzēšana nelielās telpās (dzīvokļu un skapju sistēmas)
Ne katram audzētājam ir pieejama atsevišķa telpa audzēšanai. Audzēšana dzīvokļos, skapju sistēmas un kompakti iekārtoti telpu risinājumi kļūst arvien populārāki, jo tie ļauj audzēt augus diskrēti ierobežotā telpā.
Audzēšana nelielās telpās vairāk vērsta uz efektivitāti nekā uz augu skaitu.
Dzīvokļu augkopības sistēmas
Audzēšana dzīvoklī rada īpašas grūtības, jo ierobežotā telpā ir grūtāk nodrošināt gaisa cirkulāciju, siltuma izkliedēšanu un smaržu kontroli. Daudzi telpu audzētāji izmanto īpašas dzīvokļa audzēšanas stratēģijas (/growing-weed-in-apartment/), lai risinātu trokšņa, gaisa cirkulācijas un smaržu problēmas, nekaitējot augu veselībai.
Bieži sastopamās grūtības, audzējot augus dzīvoklī, ir šādas:
- Ierobežota vertikālā telpa
- Siltuma uzkrāšanās
- Ventilācijas sistēmu radītais troksnis
- Ierobežota gaisa plūsma
- Bažas par smaku ierobežošanu
Lielākā daļa dzīvokļu audzētāju plaši izmanto LED augšanas lampas, jo tās rada mazāk siltuma, vienlaikus nodrošinot spēcīgu gaismas intensitāti.
Efektīvās dzīvokļu optimizācijas stratēģijas ietver:
- Pilna spektra LED apgaismojums
- Kompakti rindas ventilatori
- Oglekļa filtrēšanas sistēmas
- Atstarojošas sienu virsmas
- Treniņu metodes ar zemu stresa līmeni
- Mazāks augu skaits ar optimizētu lapotni
Diskrētums parasti ir galvenā prioritāte, audzējot telpās, tāpēc parasti tiek izmantotas hermētiskas audzēšanas teltis un efektīvas filtrēšanas sistēmas.
Audzēšanas sistēmas skapjos
Audzēšanas iekārtas skapjos ir vienas no visdiskrētākajām pieejamajām telpu audzēšanas metodēm. Tā kā skapji jau ir slēgtas telpas, tie dabiski nodrošina stabilus tumsas ciklus un vides izolāciju. Lai veiksmīgi apgūtu, kā audzēt marihuānu skapī (/grow-weed-in-closet/), ļoti svarīga ir pareiza ventilācija un atstarojušo virsmu pārvaldība.
Skapju sistēmas ir īpaši populāras starp iesācējiem audzētājiem, jo tām nepieciešama salīdzinoši maz vietas un aprīkojuma.
Galvenās priekšrocības, audzējot telpās, ir šādas:
- Dabiska maskēšanās
- Vienkāršāka apgaismojuma vadība
- Kompakta vides pārvaldība
- Zemākas uzsākšanas izmaksas
Lai optimizētu skapja iekārtojumu, audzētāji bieži pievieno:
- Atstarojoša iekšējā odere
- Mazās ventilācijas sistēmas
- Oglekļa filtrēšana
- Kompakts LED apgaismojums
- Augstuma kontroles sistēmas
Audzēšana skapī ir mazāk saistīta ar apjomu, bet vairāk ar pilnīgas vides stabilitātes uzturēšanu nelielā telpā.
Kā panākt, lai kaņepes augtu ātrāk
Kaņepju augšanas ātrums ir atkarīgs no tā, cik efektīvi augs pārvērš vides resursus biomasā. Lai gan ģenētika nosaka auga pamata potenciālu, vides optimizācijai ir liela nozīme attīstības paātrināšanā. Audzētāji bieži vien paātrina augšanas procesu, optimizējot apgaismojumu, veidojot lapotni un nodrošinot stabilus vides apstākļus, lai kaņepes telpās augtu ātrāk.
Veseli kaņepju augi strauji aug, ja stresa faktori ir samazināti līdz minimumam.
Galvenie izaugsmes paātrinājuma faktori
Uz izaugsmes ātrumu būtiski ietekmē vairāki faktori:
- Stabils apgaismojuma grafiks
- Pareizs barības vielu devu laiks
- Sakņu skābekļa apgāde
- Temperatūras stabilitāte
- Līdzsvarots mitruma līmenis
- Efektīva gaisa plūsma un CO₂ apmaiņa
Daudzi pieredzējuši audzētāji pievērš lielu uzmanību sakņu veselībai, jo veselīgas saknes tieši ietekmē barības vielu uzsūkšanos un kopējo augšanas ātrumu.
Vides nestabilitāte bieži vien attīstību kavē vairāk nekā barības vielu trūkums. Pārmērīga laistīšana, svārstīgas temperatūras un slikta gaisa cirkulācija var ievērojami aizkavēt augšanu.
Uzlabotas izaugsmes optimizācijas metodes
Kad pamati ir nostabilizējušies, audzētāji dažkārt ievieš sarežģītākas optimizācijas metodes, lai uzlabotu lapotnes efektivitāti un augšanas ātrumu.
Tie var ietvert:
- Treniņš ar zemu stresa līmeni (LST)
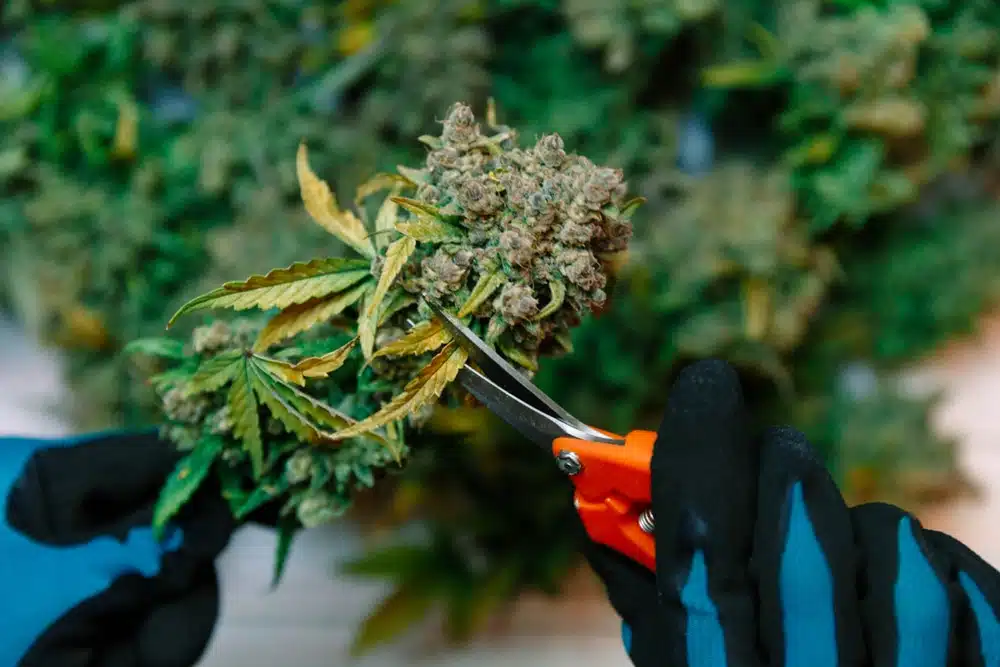
- Kronas un lapotnes kopšana
- ScrOG sistēmas
- CO₂ papildināšana
- Stratēģiska atzarošana
- Optimizēta fotoperioda pārvaldība
Izaugsmes optimizācijas mērķis nav vienkārši izaudzēt lielākus augus, bet gan veidot veselīgākus lapotnes, kas efektīvāk sadala gaismu visās ziedkopu vietās.
Stresa mazināšana, vienlaikus nodrošinot maksimālu apgaismojumu, bieži vien ir ātrākais veids, kā paātrināt augšanu telpās.
Cik augsts izaug kaņepju augs?
Kaņepju auga augstums lielā mērā ir atkarīgs no ģenētikas, apgaismojuma intensitātes, trauka izmēra un veģetācijas perioda ilguma. Izpratne par to, cik augsts izaug kaņepju augs, ir būtiska, plānojot telpas iekštelpās, piemēram, teltīs, skapjos vai dzīvokļos.
Daži šķirņu augi dabiski saglabā kompaktu augumu, bet citi ziedēšanas laikā strauji izstiepjas.
Indicas un Sativas augšanas īpatnības
Šķirnēm ar Indica dominanti parasti raksturīgi:
- Īsākas, kuplākas struktūras
- Lielāks attālums starp mezgliem
- Blīvāki lapotnes
Šķirnes ar sativas dominanti bieži rada:
- Straujāka vertikālā augšana
- Ilgāks ziedēšanas periods
- Ilgāka zaru attīstība
Šī atšķirība ir svarīga telpu audzētājiem, jo pārmērīga vertikālā augšana var ātri pārpildīt telts, skapjus un dzīvokļu sistēmas.
Telpu augstuma pārvaldības metodes
Iekštelpu audzētāji aktīvi regulē augu augstumu, izmantojot veidošanas un vides stratēģijas, piemēram:
- Treniņš ar zemu stresa līmeni (LST)
- Apgriešana un atzarošana
- ScrOG lapotnes sistēmas
- Podiņu izmēra pārvaldība
- Agrāka ziedēšanas sākuma posmi
- Gaismas attāluma regulēšana
Augstuma kontrole kļūst īpaši svarīga kompaktajās audzēšanas telpās, kur pārmērīga augu izstiepšanās var novest pie situācijas, kad augi atrodas bīstami tuvu apgaismojuma sistēmām.
Vai kaņepes var pārāk izaugt? (Lapojuma kopšana)
Jā — telpās audzētiem kaņepju augiem var pilnīgi noteikti izaugt pārāk lieliem, ja to veģetatīvā augšana netiek pienācīgi kontrolēta. Pārmērīga izaugšana (/can-you-overgrow-marijuana/) parasti rodas tad, ja audzētāji pārāk ilgi pagarinā veģetatīvo ciklu vai nespēj kontrolēt lapotnes izplatību ierobežotās telpās.
Blīvi, nekopti lapotnes bieži rada nopietnas vides problēmas telpās, kur notiek audzēšana. Audzētāji, kuri nav pārliecināti, vai augs nav kļuvis pārāk liels savai videi, var uzzināt vairāk par pazīmēm, kas liecina, ka kaņepes ir pārāk izaugušas.
Pārmērīgas augšanas riski
Pāraugušiem kaņepju augiem parasti attīstās:
- Samazināta gaismas caurlaidība
- Nepietiekama gaisa cirkulācija kupola iekšienē
- Vietas ar paaugstinātu mitrumu
- Palielināts pelējuma risks
- Zemākas kvalitātes apakšējie pumpuri
- Lielāka neaizsargātība pret kaitēkļiem
Šādas problēmas ir īpaši izplatītas pārblīvētās audzēšanas teltīs, kur gaisa plūsma nevar vienmērīgi cirkulēt pa augu struktūru.
Pārmērīgas augšanas novēršana
Efektīva lapotnes apsaimniekošana parasti ietver:
- Regulāra apakšējo dzinumu apgriešana
- Stratēģiskais atstarpju izvietojums
- Kontrolētais veģetācijas periods
- Treniņu metodes kupola izlīdzināšanai
- Lapu noņemšana gaisa plūsmas uzlabošanai
Kannaabisa audzēšana telpās bieži vien ir vairāk saistīta ar lapotnes kopšanu nekā ar augu skaitu. Pareizi kopta lapotne nodrošina vienmērīgu gaismas sadali, uzlabo gaisa cirkulāciju un veicina vienmērīgāku ziedkopu attīstību visā augā.
Veiksmīgas telpu kaņepju audzēšanas vides izveide
Viena no svarīgākajām atziņām, ko gūst pieredzējuši telpu audzētāji, ir tā, ka kaņepju audzēšanā nav jēgas tiekties pēc galējībām. Spēcīgākas lampas, koncentrētāki mēslošanas līdzekļi vai lielāki augi automātiski nenodrošina labāku ražu.
Veselīga audzēšana telpās balstās uz līdzsvaru.
Ja temperatūra, mitrums, gaisa plūsma, apgaismojums, sakņu veselība un lapotnes kopšana darbojas saskaņoti, kaņepju augi var veltīt savu enerģiju ziedu veidošanai, nevis stresa pārvarēšanai.
Stabila iekštelpu vide veicina:
- Palielināta terpeņu ražošana
- Labāka kanabinoīdu izstrāde
- Veselīgākas sakņu sistēmas
- Uzlabota sveķu veidošanās
- Efektīvāka barības vielu uzsūkšanās
- Kopumā augstākas kvalitātes ražas
Lielākā daļa audzēšanas problēmu rodas tad, kad kāds vides faktors pārāk atšķiras no pārējiem.
Galvenais secinājums
Kaņepju audzēšana telpās ir kompleksa vides sistēma, kurā katrs faktors ietekmē augu augšanas rādītājus.
Sākot no audzēšanas teltīm un gaisa cirkulācijas sistēmām līdz smaržu neitralizēšanai, apgaismojumam, lapotnes kopšanai un mitruma regulēšanai – veiksmīga audzēšana telpās ir atkarīga no vienmērīgas aprūpes visā augšanas cikla garumā.
Neatkarīgi no tā, vai audzējat specializētā audzētavā, dzīvoklī vai kompaktajā skapja sistēmā, principi paliek nemainīgi: samazināt stresu, optimizēt vides stabilitāti un radīt apstākļus, kas ļauj kaņepju augiem attīstīties dabiskā veidā.
Iegūstot pieredzi, sāk saprast, ka labākie telpu audzētāji nevis vienkārši audzē lielākus augus — viņi veido labāku vidi.
Aleksandrs Broodriks ir ļoti pieredzējis audzētājs, kurš jau daudzus gadus raksta par savu pieredzi internetā. Ar vairāk nekā 5 gadu pieredzi kanepes nozarē Aleksandrs ne tikai iesaistās sarunās ar daudziem saviem lasītājiem, bet arī sniedz informāciju. Aleksandrs ir publicējis daudz rakstu par kanepi internetā, un mēs esam ļoti priecīgi, ka viņš ir pievienojies The Seed Fair, lai palīdzētu papildināt mūsu tīmekļa vietni ar savu izsmeļošo saturu. Viņš ir veltījis sevi lasītāju izglītošanai par jaunākajām tendencēm un attīstību šajā strauji mainīgajā tirgū. Iepazīstieties ar viņa biogrāfiju mūsu autoru lapā Alexander Broodryk, Author at The Seed Fair.