No products in the cart.
Marijuana Education
The First Signs Of Cannabis Flowering Indoors And Outdoors

28
Feb
Feb
Not sure if your cannabis plant is showing the first signs of flowering?
Understanding the entire process of your plant’s growth is crucial in determining how to handle it. It’s vital to know the specific nutrients it needs and how much time it requires for light.
The flowering stage is when cannabis plants’ growth slows, and they start focusing energy on bud production. You see nodes forming with stigmas and pistils, which ultimately turn into flowers.
They eventually grow into lovely flowers with the cannabinoids and terpenes that cannabis consumers adore. If you don’t take the necessary precaution at this point, pests and errors may impact the quality and quantity of your harvest.
You should, therefore, pay close attention to your setups once you see indications of flowering.
The flowering phase: When does it begin?
The complete flowering stage is made up of the pre-flowering and flowering stages. Your plants’ readiness to blossom varies depending on various factors and whether you choose to grow inside or out.
Female cannabis plants grown outdoors bloom at the end of summer, when the days begin to shorten. Here is a detailed article on when you can expect flowering outdoors.
Indoors you have more control over your plant’s flowering stage if growing inside. You shift your plants into flowering after roughly four weeks into the vegetative stage.
Your crops change their attention from leaf development to forming buds when the amount of light they receive decreases. Inside, you trick the cannabis plants into thinking summer is ending by switching the lighting schedule to 10–12 hours of darkness daily.
Provide them with the proper environmental conditions, lighting, and nutrients in this stage to ensure the best yields.
Autoflowers: As they reach a particular size or age, they display the first signs of the flowering stage. The vegetative stage lasts about four weeks, spontaneously transitioning to the flowering stage. They don’t require a photoperiod shift to the flowering cycle, so you don’t need to stress about changing the light cycle.
How do you know when an autoflower is flowering?
The progress of autoflowering cannabis is the same as that of its photoperiod counterpart. The only variation is speed and lack of external influence.
The first signs of the flowering stage in autoflowers start showing after around four weeks into vegging.
The pre-flowering stage typically lasts one week (instead of two or three), and bud fattening occurs during the next four weeks.
Despite these differences, an auto crop produces trichomes and buds in the same way as a photoperiod plant.
Cannabis grown without light tends to be ready for harvest by the fifth week, in contrast to photoperiods which need an additional three weeks to ripen.
Females’ first blossoming signs
The development of stigma and buds is one of the first flowering stage indicators in female plants. They develop sticky, THC-rich buds which lose their potency if fertilized.
If you’re worried about males, there’s still time to remove them by the second month of the flowering phases. You must separate the entire bud site if you see male plants, as they might fertilize your entire crop.
Why is it important to eliminate the male cannabis plants in your garden?
Most marijuana consumers value sinsemilla, or unfertilized buds, as they’re more potent and yield more THC than any other part of the plant.
A fertilized female shifts her attention from producing buds to grow seeds, affecting the final product’s quality.
Males also generate THC, although far less of it than females. Pay close attention to your plant’s gender and avoid fertilization to grow the most potent buds.
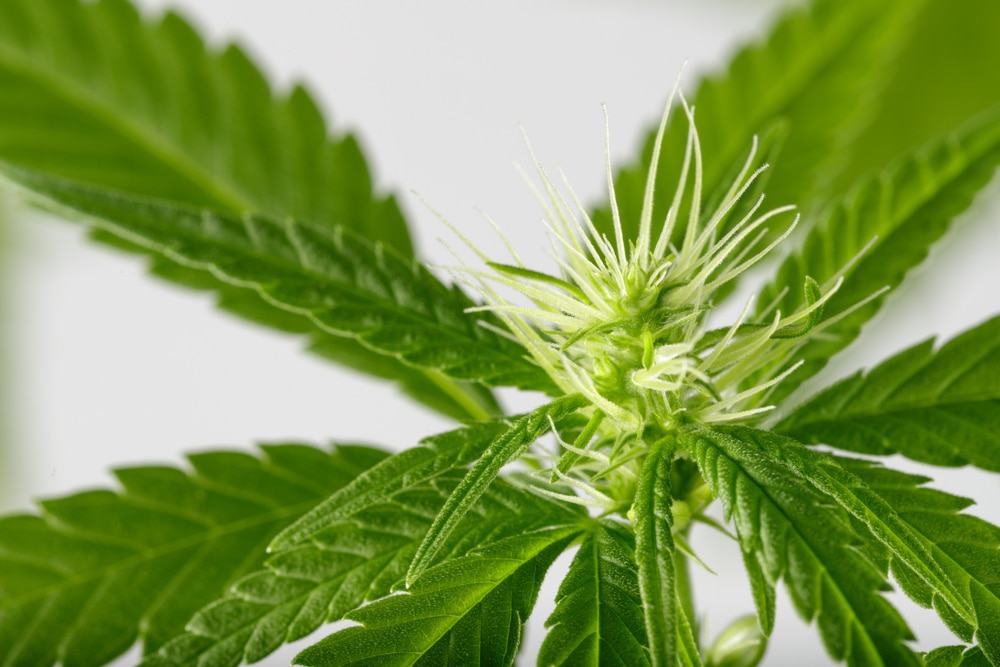
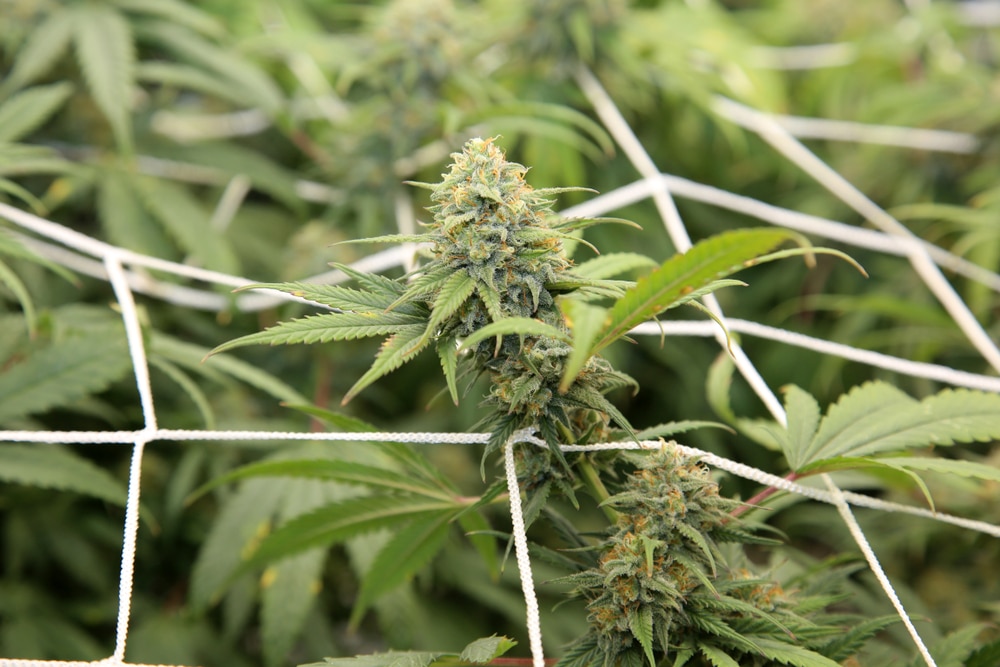
How do buds appear when they first begin to form?
The buds from cannabis plants comprise of numerous calyxes, which appear as small teardrop-shaped formations surrounding the cannabis seed in the event of pollination.
The green structure is heavy, rounded between the stem and leaves, and covered in pistils.
After a few weeks, you start to see intriguing changes in your weed plant during the first signs of flowering.
It stops generating leaves at this time and starts producing tiny white pistils that spread out quickly along the plant’s surface. Flowers form on the buds, and tiny hairs start growing out.
Pay close attention to these blossoms as they start to display their sex at this point. A female cannabis plant produces pistils during flowering, while their male counterparts have pollen sacs.
Male crops grow taller than females, enabling them to release pollen on the female pistils.
The flowering stage weekly overview
Your cannabis plants reach the pre-flowering stage after receiving their first day’s 12/12 light cycle, indoors or outdoors.
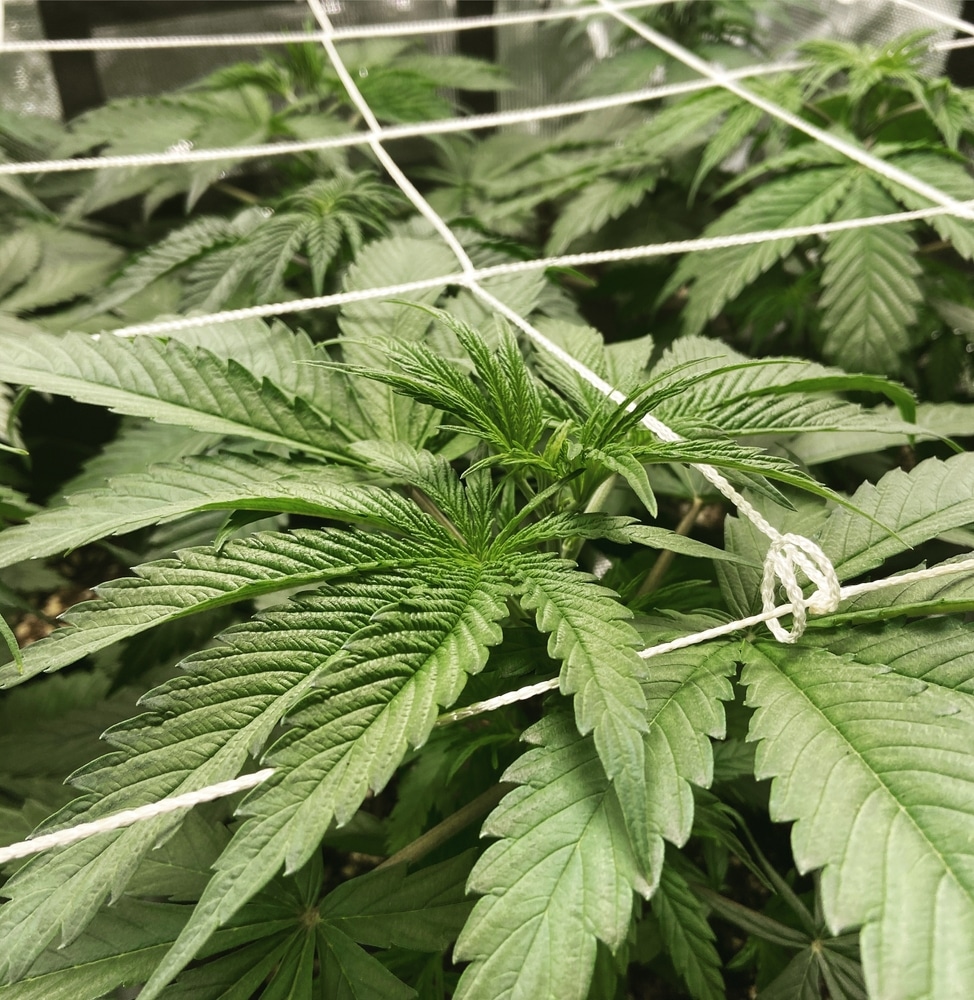
You may want to practice training plants as they stretch out during this time. Specific techniques can prevent overgrowth, boost yields, and enhance crop health.
After the first signs show, the buds of the flowering cannabis take 7-9 weeks to mature fully.
This timeframe varies depending on growing conditions, seed type, strain, and cannabis variety. Depending on the environment and genetics, the pre-flowering stage might last up to three weeks.
Autoflowering cannabis typically takes about one week, while a photoperiod takes around two. After completing its vegetative growth stage, your plant generates colas as it matures. The flowers bloom, expand, and release their sweet scents.
How should you support your plants’ growth when they start their flowering stage? Let’s explore the weekly process.
Pre-flowering week 1
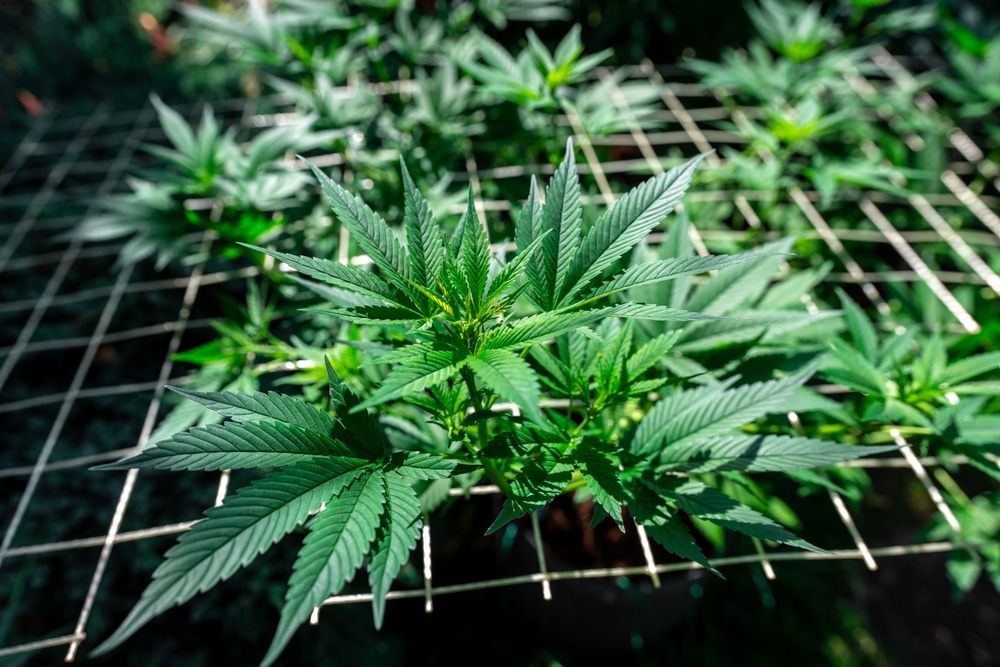
The most prominent factor you notice first is a lot of leaf growth.
In preparation for Winter, the plant spreads out to make room for bud formation, which is why this period is known as the stretch week. It’s not uncommon for plants to double in size during this time.
Greenery is now more pronounced and robust, exhibiting blooming signs like those in the vegging stage.
While this growth spike is a sign of the flowering stage, wait before changing to bloom nutrients. Add a lot of nitrogen to the mix for at least five days to encourage your plant into the next phase.
Pre-flowering week 2
Your plant exhibits the first prominent signs of growth in the second week.
It doesn’t start flowering yet, but you notice white pistils forming between the main stem and fan leaves.
The leaves cluster and twist together at the top along each branch. From their centers, the cannabis plant begins to produce pre-flowers with pistils resembling “white hairs.” But there are rarely any visible resin glands or trichomes.
If you notice tiny green coatings on the internodes, your crop is a male weed plant. Try to get rid of these herbs at this point to discourage pollination.
Slowly start providing less nitrogen and supplement your plants’ food with more cannabis macronutrients like potassium and phosphate when they begin flowering.
Pre-flowering week 3
By this point, your plant has almost doubled compared to a few weeks ago.
It still keeps growing but typically slows down significantly. It should stop stretching by the end of this week.
You notice clear indications that the flowering stage has begun. More pistils have appeared, and you see tiny buds developing at the site where you saw hairs the previous week.
Trichomes and resin glands start blossoming, but they won’t be prominent yet, and the plant’s scent is likely still faint.
This cannabis flowering stage is critical, as it’s when your plant diverts its energy to bud production. It’s vital to provide it with the correct nutrients in adequate amounts.
Always check the labels of your plant food and understand the specific strain’s requirements to provide the proper dosages. You want to avoid over or underfeeding as it could result in nutrient burn or deficiencies.
Inspect your plants carefully to catch the first signs of damage before they progress. Your crops are more sensitive in the first few weeks of growth, so watch out for potential loss of leaves, discoloration, or yellowing.
If these symptoms occur, cut down on feeding to avoid further problems. Don’t stress; they still have time to recover at this pre-flowering stage.
Watch your plant grow and enjoy the experience of seeing it increasingly form buds.
The flowering stage
By now, vegetative growth is likely over, and your plant is prepared to begin the step you’ve been waiting for, the flowering stage.
This phase typically begins about two to three weeks into the pre-flowering stage. Depending on your growing genetics, it can last five to ten weeks. This time could be longer for some more advanced strains.
You notice your bus start to grow rapidly at this point. It’s an exciting experience to watch as your nugs gradually enlarge, trichome production increases, and aromas intensify.
Flowering stage week 1
The first signs of flowering are crystal clear and remain consistent by this stage.
Vegetative development has stopped, and the blooms grow bigger as your plants produce more white pistils. You start to smell the finished product as the trichomes begin oozing enticing aromas.
The bud growth at this point depends on the cultivar. The first signs of flowering take longer to manifest in a sativa as you see the earliest cannabis pistils protrude with pride. Indica plants should already have a lot of bud sites by now.
You need to give your plant more nutrients as you notice increased bud formation.
This week is the ideal opportunity to put blooming supplements into practice. Ensure you apply your nutrients in moderation, as nitrogen burn could endanger future bud sites.
Always follow the manufacturer’s instructions and strain specifics since overfeeding might stress your marijuana plant or lead to nutrient burn.
Flowering stage week 2
The white hairs grow long during the second week of the marijuana flowering stage. By this point, they should be numerous, growing in various directions and at all bud sites.
The trichomes also appear rapidly; you should see clear resin on the surrounding leaves and growing buds.
At this point during the flowering period, the white pistil hairs on some strains may darken to a pale amber color. Some trichomes may turn opaque, indicating that harvest time is on the horizon.
Flowering stage week 3
You start noticing significant gaps in the buds when your plants reach the middle of this flowering stage.
The number of trichomes differs significantly at this point. The hairy nugs become fatter and frostier as trichome development increases.
Flowering stage week 4
If you’ve done everything correctly, the buds ought to be strikingly boastful with enticing aromas at this point.
If the atmosphere is favorable, there’s little left for you to do except to watch for errors and other warning signs of bud rot or other issues.
Although the nugs may appear ready, you must wait until the proper harvest time. Reaping too early affects the yields and may even alter the desired effects.
The buds need to become denser, and the cannabinoids inside the trichomes should almost reach their peak potency this week.
Flowering stage week 5
The fifth week of the flowering stage is typically the final week of blooming.
Remember that not all marijuana strains flower at the same rate. While most autoflowers bloom this quickly, photoperiods often take at least four additional weeks to reach full maturity.
At this point, the only thing left is to begin the flushing process if necessary. You should start when the buds are as dense as they should be and don’t indicate further development.
Before harvest, flush for at least a week to give your flowering weed plant time to remove residual blooming nutrients. Doing this also helps to improve the crop’s flavor and scent.
Without proper flushing, you won’t obtain a genuine, well-rounded cannabis experience from strains with nuanced and complex terpene profiles.
It’s vital to understand the trichomes’ condition, such as amber, cloudy, or clear. Each has a unique effect and standard procedure for determining when to harvest.
Amber trichomes produce more physical effects, while cloudy ones have a more cerebral impact since they’re at their peak potency.
Clear, transparent trichomes still need to develop further, so don’t harvest them until they become milky white, amber, and opaque.
Ensure your cannabis plants remain pest-free and keep them in total darkness for 48 hours before harvest.
Start preparing your dry room for the number of plants you expect to reap during the next few days.
Your plants are ready for removal and trimming once you’ve brought them out of the darkness.
How long does the flowering stage last?
A cannabis plant typically stays in the flowering stage for an average of 8–11 weeks, commonly broken up into three phases.
Indica strains generally need 8–10 weeks to bloom fully, while sativas typically flower for 10–12 weeks. Hybrid strains take around 6–10 weeks to mature fully.
How can I identify the gender of my plant?
When you let the flowering stage begin, it’s vital to know how to sex your plants and what is the difference between males and females to eliminate males crops asap. The fact that marijuana is dioecious suggests that a male and female reproductive system may coexist on the same plant.
What you currently have in your stash jar are the female marijuana plant blossoms that mostly come from feminized seeds.
Female marijuana crops produce the wax flower cut into the buds. Their pre-flowers appear when the plant has five or six internodes about four to six weeks from germination.
A male plant produces pollen sacs that look like bananas or little balls at the base of the leaves. They appear when you see five or six internodes three to four weeks from germination.

Female cannabis plants generate buds but don’t produce seeds. Male plants fertilize them to initiate reproduction. If you’re growing indoors, you need to ensure that male flowers and female plants don’t mix. Separating them is vital to get real buds for consumption, unless you specifically want to breed them.
It’s possible to guarantee the sex of your plants by growing clones or genetically identical cuts from the parent strain.
Feminized seeds are also helpful in producing nug-heavy plants that don’t grow seedlings. They typically have a 99% chance of resulting in only female offspring.
Basic growing conditions for flowering cannabis plants
Growing cannabis plants need the correct lighting, temperature, and humidity for optimum growth. They also require the proper nutrients and a feeding regimen suitable for each cultivation stage.
During each point in their life cycle, you must periodically change the precise amount of nutrients. Overfeeding your flowering weed plants can have unpredictable and undesirable results.
Below are the primary growing conditions for flowering weed plants:
Lighting
Lighting is crucial at every step of the cannabis plant’s life cycle, but it’s especially essential to maintain a photoperiod of 12 hours of light and 12 hours of darkness during the weed flowering stage.
Avoid opening your grow room throughout the dark hours as the plants may become sensitive to light and
- Slow down the budding process.
- Return to the vegetative phase.
- Produce hermaphrodite flowers.
Temperature
Marijuana plants thrive best in temperatures of 64–78°F during the cannabis flowering stage. If the environment drops below this range for some time, the plant may suffer adverse effects or even perish.
Temperatures under 60°F can delay development, while over 84°F may permanently harm the plant. Weed crops also suffer from extreme temperatures that may cause issues like excess dryness, excessive water evaporation, burnt leaves, and stunted growth.
Humidity
Relative humidity (RH) measures the amount of moisture in the atmosphere as a percentage. Maintaining this in the grow room is essential, particularly during the first signs of flowering. Keep RH between 40 and 50% during the flowering stage. Excessive humidity might result in issues like fungi and mold development.

Nutrients
The three primary nutrients a weed plant requires to grow include nitrogen (N), phosphorus (P), and potassium (K). As cannabis flowering begins, you should progressively increase phosphorus and potassium concentration and lower nitrogen.
For instance, you may use NPK 5-9-9. Specific fertilizers are available for vegetative growth and during the first signs of flowering. For the best results, purchase packs that contain the correct nutrients for each stage.
The plant requires additional secondary nutrients for proper growth:
- Calcium (Ca)
- Sulfur (S)
- Magnesium (Mg)
Micronutrients are vital, but only in minimal quantities:
- Silicon
- Molybdenum
- Copper
- Cobalt
- Chlorine
- Boron
- Iron
- Manganese
- Zinc
The flowering stage begins when the plant starts to produce pistils.
If you intend to transition into the cannabis flowering stage quickly, apply blooming nutrients in weeks 4 or 5 of the vegetative stage.
If you want to prolong vegetation, only start feeding nutrients when your plants start flowering.
It’s up to you to decide how to provide these nutrients, through solid, liquid, or foliar weed fertilizers.
Even when grown organically, you need more than bare soil for the plant to develop dense, large buds. Various companies offer fertilizer packages created explicitly with the appropriate nutrients for each stage.
Start with the recommended dose from the manufacturer, or even half that amount, to prevent saturation or nutrient burn. Gradually raise the dosage until you obtain the desired effects when your plants start growing rapidly.
Watering
Nourish your plant regularly with safe, clean water. Irrigating with chlorine-free or filtered water produces superior outcomes. Aim for excellent drainage and never overwater your plants.
An appropriate soil moisture test would be to stick your finger a few centimeters or an inch into the soil. If it feels dry, then it’s the right time to water.
Ventilation
A healthy cannabis plant needs ventilation and airflow to develop. They require oxygen at this stage to breathe, grow, and prevent the growth of rot, fungi, and mold. A good exhaust fan within your growing space is helpful, but don’t direct it at the buds. It needs to promote airflow and ventilation while reducing humidity.
A dehumidifier may be the best and simplest option to maintain appropriate humidity levels if an exhaust fan is insufficient.
PH levels
Correct pH during the cannabis flowering stage is essential, and it must remain between 6 and 7 while growing plants in the soil. Most of the nutrients in the growing area are only accessible to the plant within this range.
Plants can’t absorb nutrients when the pH exceeds the ideal amount, even if they’re in the soil. As a result, your crop may experience toxicity and nutritional deficits.
Container sizes
The expected size of your plant determines the size of a container.
There are various options to grow your weed:
- Garden soil
- Pots filled with soil
- In Hydro
- Buckets
Remember to transplant your plant when you see the first signs of flowering stage to reduce straining or unknowingly damaging it.
Tips for a better harvest
Although spotting the initial flowering stage signals can be exciting, novices may find it scary. How can you make sure everything is perfect during this crucial development phase?
Follow these easy tips to guarantee a fantastic harvest, whether growing outdoors or inside:
Determine the sex of your plants
Determining the sex of your plants is essential in preventing seeded and non-smokable marijuana. Plant sexing is possible in the initial and second weeks of budding. The first signs of flowering in a cannabis plant are thin, wispy pistils.
Keep a close eye on your plants as they blossom in the event any hermaphrodites appear. Although rare, some cannabis plants can create both male and female blooms.
Some weed plants may develop stamens in a desperate attempt to produce seeds under tremendous stress.
Remember to separate the female plants from the male ones to prevent pollination. Consider obtaining feminized marijuana seeds from a reputable source to avoid such problems.
Ensure healthy blossoming
Healthy plants are almost guaranteed if the pre-flowering stage is productive. If you’re growing indoors, only alter the light schedule when your plants are healthy. Repairing deficits and insect damage in budding plants is more difficult as they mature.
If you’re growing your plants outdoors in the middle of summer, pay close attention to your crop greenery. If you spot any yellowing leaves, address that problem early to observe flowering on a healthy specimen.
It’s best to stop transplanting and training when the plant shows signs of flowering stage. Both techniques could breed hermies, stress plants, and reduce harvest quality if you continue them for too long.
Transition progressively
Pre-flowering marijuana has different nutrients, humidity, and temperature requirements than vegging plants.
The environment must be consistently ideal, even for fully bloomed crops. Abruptly altering the setting stresses your plants. The only aspect you can influence during the flowering stage outdoors is the nutrients. To reduce crop stress, gradually switch from veg to flowering solutions.
Indoor cultivation helps you ease the transition. Change the lighting, temperatures, and humidity slowly and incrementally rather than all at once. Start with adjusting the temperatures and wait one day before reducing the humidity. Switch on the lights to witness the first signs of flowering once the crops have adapted to these changes.
Set the proper conditions
Follow these tips to provide the ideal environment for your plants to flower:
- Reduce the relative humidity to under 45% to stop bud rot.
- Maintain a nighttime temperature of around 65 °F and approximately 75 °F during the day.
- Increase CO2 levels to 1,000–1,200 ppm for a robust bloom.
Note that some strains have requirements that differ from the ones above. Research the cultivar you want to use to ensure the best results.
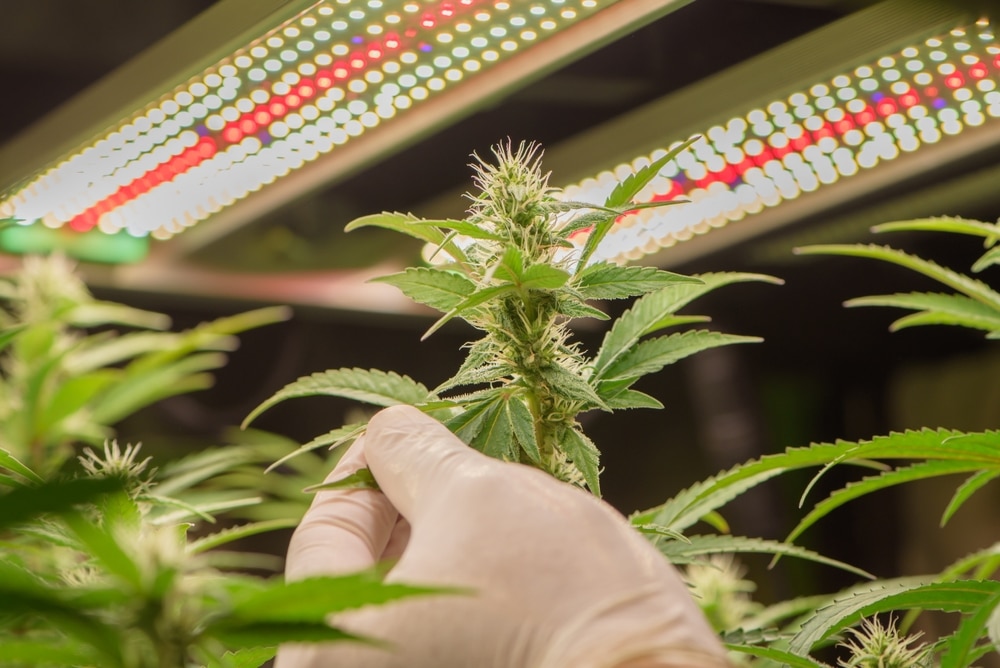
Change the lighting
Take advantage of modern lighting technologies for indoor cultivation to produce substantial harvests.
Both harvest-ready cannabis and ones in the pre-flowering stage enjoy an orange and red grow light. Use 580–700 nm wavelengths if possible.
Feeding for flowering
Learning how to increase the size of buds during flowering depends on having the proper nutritional levels. Inadequate and excessive feeding can negatively impact harvests.
As a general guideline, start adding lots of potassium and phosphorus after the first signs of the flowering stage are visible. Use a pre-made fertilizer and cease feeding your plants if you see any signs of nutrient burn.
Remove extra foliage
You should trim and train crops that are beginning to flower, but it’s a good idea to do a complete trimming job before then.
Doing so reduces energy consumption, increases light aeration and exposure, promotes healthy foliage, and delivers nutrients to potential bud locations.
Remove all fan leaves that are not producing. Aim for short, partially formed branches and broad leaves that shade the plant. Cut the leafy, yellow, and lifeless areas while you’re at it.
Support heavy buds
Flowering plants may sag due to the weight of their buds, especially if you’re growing slim sativa strains.
Consider assisting them by securing bamboo sticks to support heavy branches. You protect the crop from snapping and bending, which can be harmful.
Know when to harvest
Getting potent buds requires understanding when to harvest marijuana plants. Calculate your strain’s anticipated flowering time based on its current visual characteristics.
Brown pistils that are coiled and trichomes with an impenetrable clarity are indications of the end of flowering. These characteristics ensure that you collect buds at their peak THC concentrations.
Harvest a little early if you want a more energizing high, but a little later if you want a calm high with that familiar couchlock sensation.
Avoid harvesting too early or too late to avoid having an unfavorable high or an effect that is too subtle.
You’re ready to reap your crops when at least half of the plant’s pistils are red. Below are a few additional indicators:
- Resin that’s thick, clearly visible, and apparent to the human eye.
- Plants that are heavily bearing buds and curled brown pistils.
- Milky and white or opaque trichomes, as seen under a magnifying glass.
Patience is essential in harvest timing. Reaping may occur slightly earlier than anticipated, especially if the crop is unhealthy.
It’s best to collect your crops earlier if the buds appear browned or your foliage’s illness worsens. You can improve the quality of plants you need to gather early through curing.
Preparing your crops for harvest
Flushing your plants 1–2 weeks before harvest is essential for your well-being and the quality of your buds. Plants require this procedure to water and rinse nutrients and minerals, resulting in a more enjoyable and safe experience.
Flushing removes the organic or artificial nutrients to ensure that none land up in the finished edible product.
It should occur in the second month or approximately two weeks before the flowering stage concludes. This timing may vary depending on the medium and strain.
Here’s how to correctly flush your plants:
- Use neutralized water with a balanced pH level.
- Test the liquid to ensure it’s safe before providing it to your plants.
- Use this water to irrigate your plants.
When you start flushing, the color of the water at the bottom of your medium should start dark but gradually grow lighter and clearer.
Neutralized water can also aid if you have a problem with pH imbalance or nutrient toxicity in the soil.
Most variants are ready for harvest after a two to four-month growing cycle. The precise timeline varies depending on the strain, desired outcomes, and your preferences.
Warning signs while the cannabis plant is blossoming
Yellow leaves while your marijuana crops are flowering could be a warning sign of light burn or a nutrient problem.
Foxtail is another indicator of light burn. A new bud (known as a spire) breaks through the side of an older bud. It generally means incorrect growth room heat or lighting.
Unfavorable weather can also make your buds look ugly and cause your THC levels to reduce drastically or disappear.
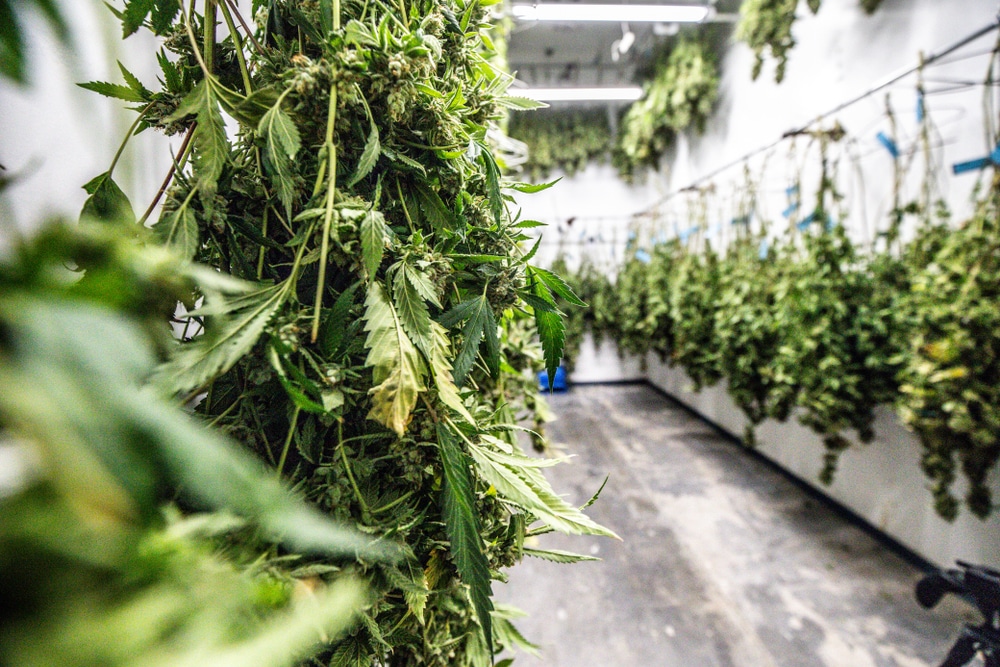
Critical steps after harvest
Cannabis cultivation doesn’t stop after harvesting your plants. You still need to dry, trim, and cure them.
Wet and dry trimming
Deciding between wet and dry trimming is essential since it can affect your flower’s smoothness, potency, and aroma.
The technique of choice relies on your knowledge, preferences, and the drying environment.
Wet trimming
Wet trimming is cutting cannabis buds after harvest before they start drying. Chop each branch close to the node that joins the older, significant growth with each new stem offshoot.
Delicately prune the little sugar leaves on each bloom, working your way up from the flower’s base.
The buds are ready for curing and drying after removing any sugar leaf residue during a wet trim.
Advantages of wet trimming
- Wet cutting allows easier removal of sugar and fan leaves, which are more challenging to handle when dry.
- It requires less space than dry trimming because the entire plant isn’t suspended.
- Fan leaves hold moisture, so wet trimming reduces the likelihood of mold harming your yield.
Disadvantages of wet trimming
- You must perform wet trimming immediately after harvest, which may take time based on the number of plants.
- You don’t let plants dry naturally, which could negatively affect the quality of the blooms.
- After wet trimming, your hands and scissors could become sticky. You need to wipe everything continuously with rubbing alcohol.
Dry trimming
Dry trimming is pruning cannabis buds after drying them but before curing them. It typically involves hanging freshly cut branches upside down.
The drying process takes 10–14 days to reach the correct moisture content.
Divide big individual branches into manageable bits after drying. Gently trim the sugar leaves out of each bud, starting from the bottom and moving your way up.
Carefully deposit the trimmed buds into curing containers. Preserve them until the active ingredients in the remaining trichomes achieve their ideal aroma and intensity.
Advantages of dry trimming
- It gives you better control over drying time since leaves store moisture. This method prevents the plant from drying out too quickly.
- It gives you the freedom to dry slowly, making the process simpler.
- It results in a smoother and better-tasting smoke during consumption, with less chlorophyll remaining in the buds.
Disadvantages of dry trimming
- Dry leaves might cling to the blooms, making it more challenging to trim them.
- Fan leaves retain moisture when drying, increasing the danger of mold growth.
- Dry trimming takes up more room since you hang the entire plant with branches and leaves.
Drying marijuana plants
Once you harvest your plants, it’s time to hang them in the drying room.
The drying process helps to preserve and enhance the flavors by eliminating the chlorophyll that gives flowers their characteristically plant-like taste.
Hang your harvests upside-down in an environment with a relative humidity of 60% and between 68 and 72°F temperature. Cannabis plants take between 10 and 14 days to dry, depending on how you cut them.
Curing marijuana buds
Curing the buds is the next stage after drying and trimming them. You need to keep the flowers in airtight glass containers to prevent moisture loss and maintain their terpene content. Ensure the relative humidity stays between 55 and 65%.
Depending on your strain and preferences, this process may take one to four weeks.
Proper curing not only prolongs the freshness of your marijuana but also lowers the chance of mold growth.
As long as you cure and preserve your flowers, they should last at least two years.
Burping while curing
Burp your buds within the first week of curing to restore oxygen and release moisture in the jar.
Temporarily remove or open the lid of your storage container and shake your nugs around for about ten seconds. Close the jar and repeat this process daily.
If there’s a disagreeable smell, the buds could develop mold. If this occurs, burp your jars more frequently until they dry correctly.
Happy blooming
Understanding the early signs of blossoming and how marijuana plants develop is essential for properly treating and diagnosing growing issues.
Pre-flowering, the initial stage, typically occurs between the first and third weeks. Plant growth quickens before abruptly stopping as pistils begin to show.
The last and most crucial phase of marijuana growth is known as the flowering stage. You get to watch your lovely buds grow and exude their delicious scents during this time.
Autos are usually ready for harvest after week five, while photoperiods require an additional three weeks. Unlike the vegetative stage, everything that occurs during flowering directly affects the buds.
Taking extra care during this phase is crucial as the pungent smell can draw bugs and unwanted attention. The weed flowering stage requires minimal maintenance but relies on patience and ideal conditions.
When the time comes to smoke your flowers, you appreciate them even more if you take pleasure in taking good care of your cannabis plants.
Stop by The Seed Fair to begin your journey toward abundant, high-quality cannabis flowering. Happy blooming!
FAQs about cannabis flowering stages
Have you still got burning questions about the first signs of flowering in cannabis plants? Whether growing outdoors or inside, check out these tips below to get the most out of your experience.
Do I need to trim the fan leaves while it’s blooming?
It would help to cut the fan leaves away once the blooms bloom. Decrease shade and improve the lower canopy’s airflow by eliminating them to provide extra energy for your plant’s essential parts, enhancing health.
Why does complete darkness help promote flowering in indoor plants?
Cannabis reacts to specific light spectrums; they need both light and darkness to produce energy and process food. Artificial lighting contains elements that might promote flowering, whereas moon spectrums do not.
How long does the flowering phase usually last when grown indoors?
Indoor plants blossom when the lights are turned off for 10–12 hours. Most cannabis strains require 7–9 weeks to bloom fully, while some, especially sativas, need more time.
How long should you use nutrients?
Employ nutrients at any time of the plant’s growth cycle until around two weeks before harvest. Stop giving nutrients around at this time to flush the plants. Some growers don’t do this, but it’s beneficial to enhance the flavor of your buds.
How can I speed up the beginning of my bloom?
Speed up a photoperiod strain’s growth cycle by exposing it to light for 10–11 hours daily. By dimming the lights, the plant thinks summer is ending, which triggers it to switch to flowering.


