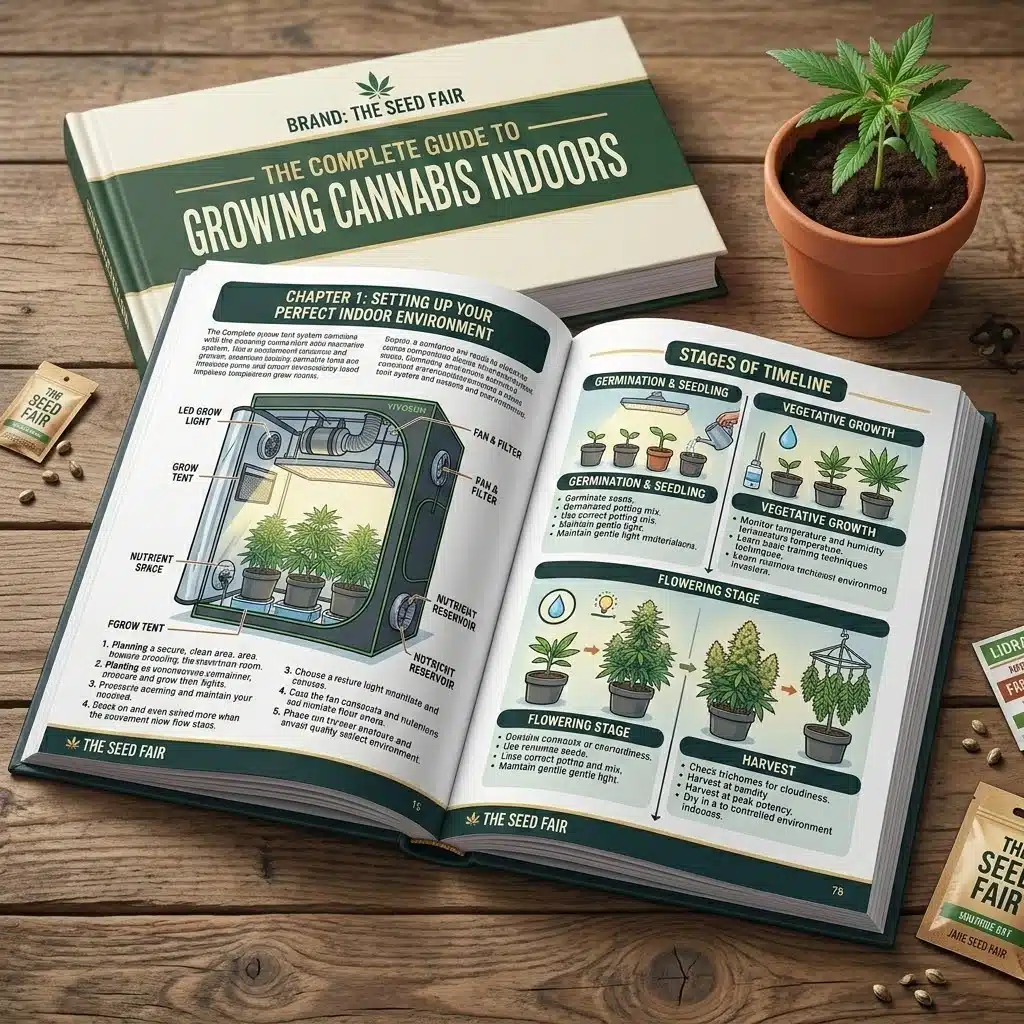
Complete Guide to Growing Cannabis Indoors (Environment, Space, Odor Control & Optimization)
Jun
Indoor cannabis cultivation is ultimately about control. Unlike outdoor growing, where weather and seasonal changes determine how a plant develops, indoor growers create the entire environment from scratch. Lighting, airflow, humidity, temperature, nutrients, and even odor management all work together to influence how healthy a cannabis plant becomes and how productive the final harvest will be.
For many growers, the appeal of indoor cultivation comes down to consistency. A properly managed indoor setup allows cannabis plants to develop under stable conditions year-round, producing dense flowers, stronger terpene profiles, and more predictable yields. Whether you are using a full grow tent system, converting a closet into a grow space, or working within the limits of an apartment, success depends on how well the environment is managed. Heat buildup, limited airflow, vertical space, humidity, light distribution, and odor can all become constraints when the setup is poorly balanced.
This guide covers the core systems involved in indoor cannabis growing, including environmental management, grow tents, odor control, space-saving techniques, canopy management, and growth optimization strategies.
Understanding Indoor Cannabis Cultivation Systems
Indoor cannabis growing is best viewed as a controlled ecosystem. Every piece of equipment inside the grow space influences how efficiently the plant performs photosynthesis, absorbs nutrients, and produces cannabinoids and terpenes.
Most indoor growers rely on enclosed systems such as grow tents or sealed grow rooms because they allow environmental variables to be managed far more efficiently than open spaces. Reflective walls improve light distribution, ventilation systems regulate airflow, and filtration systems help stabilize humidity and odor levels.
The primary environmental variables that determine plant health include:
- Temperature stability
- Relative humidity control
- Airflow and air exchange
- Lighting intensity and photoperiods
- Root zone moisture and oxygenation
- CO₂ availability during photosynthesis
When these systems remain stable, cannabis plants can direct more energy toward structural growth and resin production instead of stress recovery.
Many beginner growers underestimate how connected these variables are. For example, increasing light intensity often raises temperatures, which then impacts humidity and transpiration rates. Experienced cultivators learn that indoor growing is less about maximizing one variable and more about balancing all of them together.
Cannabis Growth Stages and Environmental Requirements
Cannabis plants move through several distinct growth phases, and each stage requires a different environmental approach. Conditions that work well during vegetation may become harmful during flowering.
Understanding these transitions is one of the biggest differences between average indoor growers and highly successful ones.
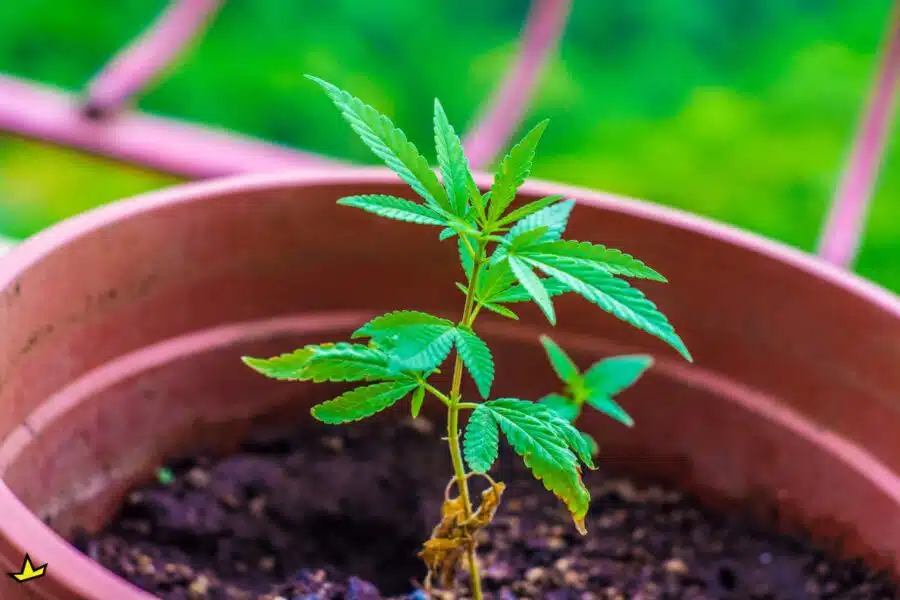
Seedling Stage (Establishment Phase)
Seedlings are extremely delicate during the first few weeks of growth. At this stage, the root system is still developing, which means the plant depends heavily on external humidity and stable warmth to survive.
Most growers maintain slightly warmer temperatures and higher humidity during this phase to reduce stress on the young roots.
Key priorities during the seedling stage include:
- High humidity to support hydration
- Mild, stable temperatures
- Gentle airflow to prevent damping-off disease
- Soft lighting that avoids excessive heat stress
One common mistake new growers make is using overly intense lighting too early. Young cannabis plants do not need aggressive light exposure during establishment. Excessive heat or low humidity can quickly dry seedlings out and stunt early development.
Vegetative Stage (Structural Development)
The vegetative stage is where cannabis plants build their structure. During this phase, roots expand rapidly, stems strengthen, and large fan leaves develop to support photosynthesis.
Healthy vegetative growth usually leads to better flowering performance later on because the plant develops a stronger framework for supporting heavy buds.
Key vegetative priorities include:
- Strong light exposure for photosynthesis
- Nitrogen-rich nutrient support
- Consistent airflow for stem strength
- Stable watering practices
- Root zone oxygenation
This is also the stage where many growers begin plant training techniques such as topping, low-stress training (LST), or ScrOG systems. These methods improve canopy distribution and help indoor growers maximize limited vertical space.
Environmental consistency matters heavily during vegetation. Large temperature swings or unstable humidity can slow growth and reduce overall vigor. Growers aiming for faster development often focus on maintaining stable daytime temperatures while avoiding excessive nighttime drops.
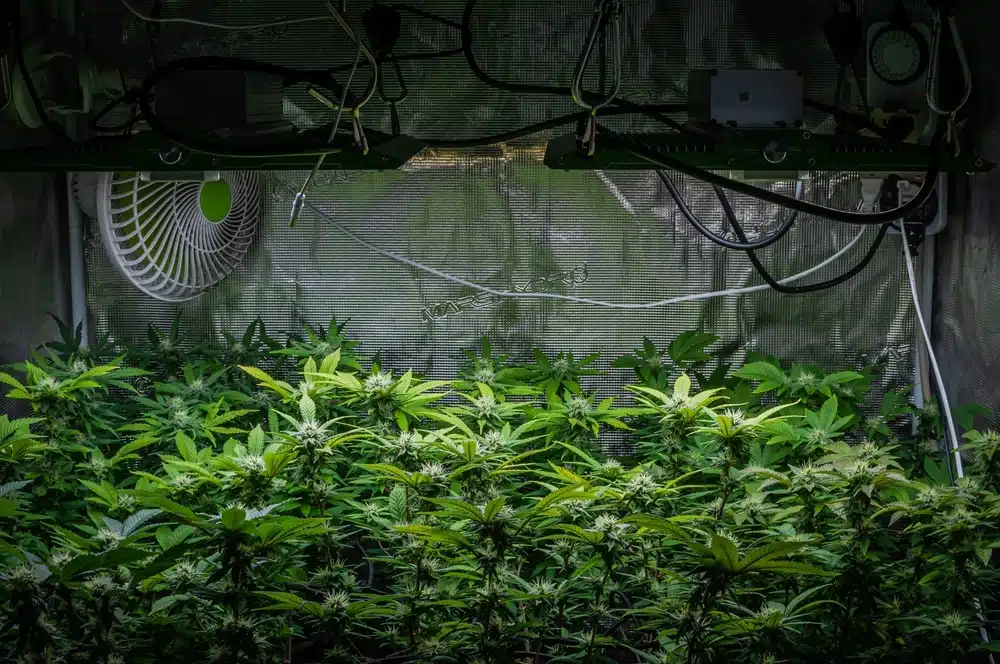
Flowering Stage (Bud Formation)
Flowering is the most sensitive stage of the indoor cultivation cycle. Once cannabis plants begin producing flowers, environmental mistakes become significantly more costly.
High humidity, poor airflow, or excessive heat during flowering can lead to mold, bud rot, terpene degradation, and lower cannabinoid production. This is especially true in dense canopies where stagnant air becomes trapped between bud sites.
Key flowering priorities include:
- Lower humidity to prevent mold formation
- Stable temperatures to reduce stress responses
- Strong airflow throughout the canopy
- Consistent light schedules (12/12 cycle)
- Proper nutrient transition toward phosphorus and potassium
Most growers notice the cannabis aroma becoming far stronger during flowering due to increased terpene production. This is why odor control systems become particularly important during the final stages of cultivation.
As harvest approaches, many growers slightly lower nighttime temperatures to encourage resin production and terpene preservation.
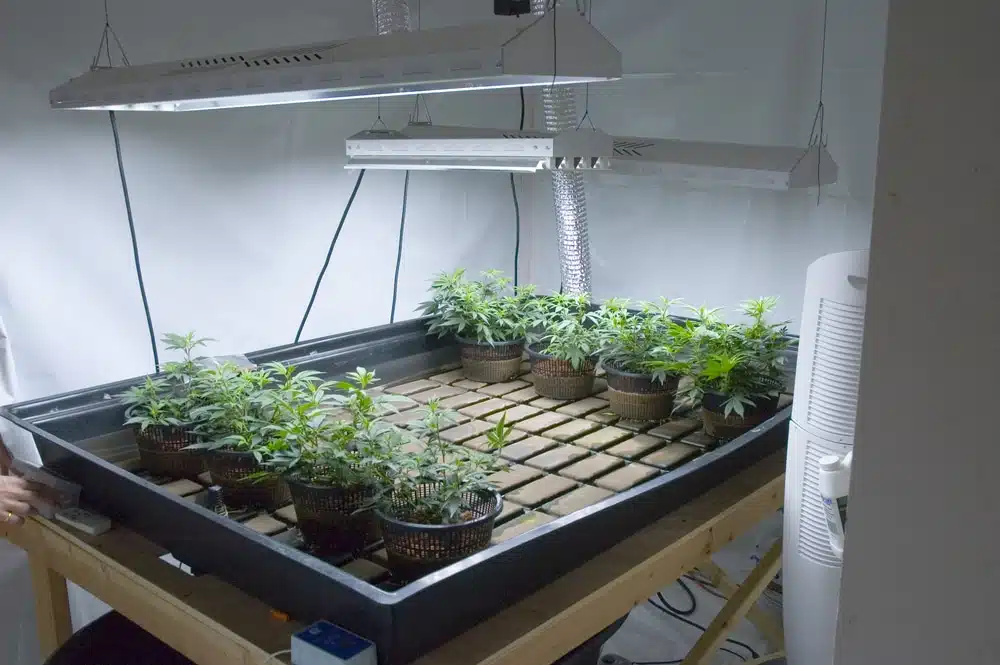
Grow Tent Systems and Controlled Indoor Environments
Grow tents have become the standard foundation of indoor cannabis cultivation because they create a fully controllable micro-environment.
Compact tents are particularly useful where the grow area has limited floor space or must remain isolated from the surrounding room. Their main advantage is not simply enclosure, but the ability to manage light, exhaust, intake air, and filtration as one coordinated system.
Unlike open-room setups, grow tents isolate environmental variables inside a reflective, sealed enclosure. This allows growers to regulate lighting, humidity, airflow, and odor far more efficiently.
Modern grow tents typically include:
- Reflective mylar interiors
- Ventilation ports
- Support bars for lighting systems
- Lightproof zippers and seams
- Space for filtration and airflow equipment
The reflective interior lining helps distribute light evenly across the canopy, improving photosynthetic efficiency while reducing wasted energy.
Benefits of grow tent systems include:
- Better climate stability
- Improved odor containment
- Increased light efficiency
- Pest and contamination reduction
- Easier environmental management
- Greater discretion for indoor cultivation
Grow tents are especially useful for apartment growers and small-space cultivators because they centralize all environmental controls into one enclosed area.
Many experienced growers eventually discover that environmental stability matters more than setup size. A small, well-managed grow tent often outperforms larger uncontrolled grow rooms.
Managing Cannabis Odor Indoors
Odor becomes increasingly difficult to contain as plants enter flowering and terpene production intensifies. In enclosed indoor spaces, the problem is rarely solved by masking the smell. Effective control depends on managing how air moves into, through, and out of the grow environment.
A typical system combines an appropriately sized exhaust fan with activated carbon filtration and enough intake capacity to maintain slight negative pressure. When the enclosure is working correctly, odor-rich air is pulled through the filter rather than escaping through zippers, doors, vents, or other gaps.
The strong cannabis smell comes primarily from terpene compounds such as myrcene, limonene, pinene, and caryophyllene. These aromatic compounds become increasingly concentrated during flowering as resin production intensifies.
Without proper airflow and filtration, cannabis odors can spread surprisingly far beyond the grow space.
Why Odor Control Matters
Effective odor management is important for several reasons:
- Preventing unwanted attention
- Maintaining discretion in residential areas
- Reducing neighbor complaints
- Supporting healthier airflow systems
- Improving overall environmental stability
In many cases, strong lingering odors are also signs of poor ventilation or insufficient air exchange inside the grow environment.
Primary Odor Control Systems
Most indoor growers rely on a combination of airflow management and filtration systems to reduce cannabis odors effectively.
The most common odor control tools include:
- Activated carbon filters
- Inline exhaust fans
- Negative pressure ventilation systems
- Sealed grow tents or enclosed rooms
- Odor neutralizers placed outside grow spaces
Activated carbon filtration is one of the most commonly used odor-control methods because it physically traps airborne terpene molecules before they leave the grow area.
Proper airflow is equally important. Exhaust systems should continuously remove warm, odor-rich air while drawing in fresh replacement air.
When negative pressure is maintained inside the grow tent, unfiltered odors are far less likely to escape.
Growers dealing with persistent odor can follow our more detailed guide to growing marijuana indoors without smell, which covers filtration, airflow, room leakage, and common odor-control failures in greater depth.
Many growers also discover that stable temperatures and humidity naturally reduce odor intensity by improving overall environmental balance.
Growing Cannabis in Small Indoor Spaces
Not every grower has access to a dedicated grow room. Apartment grows, closet systems, and compact indoor setups have become increasingly common because they allow discreet cultivation in limited spaces.
Small-space cultivation focuses more on efficiency than plant count.
Apartment Growing Systems
Apartment cultivation presents a specific set of constraints because the grow environment shares walls, ventilation pathways, and living space with the rest of the building. Heat, fan noise, light leakage, and odor may become noticeable outside the immediate grow area long before the plants show signs of environmental stress.
For that reason, apartment setups usually benefit from fewer plants, efficient LED lighting, quiet ventilation equipment, and a grow area that can be isolated from the surrounding room.
Common apartment growing challenges include:
- Limited vertical space
- Heat accumulation
- Noise from ventilation systems
- Restricted airflow
- Odor containment concerns
Most apartment growers rely heavily on LED grow lights because they produce less heat while maintaining strong light intensity.
Effective apartment optimization strategies include:
- Full-spectrum LED lighting
- Compact inline fans
- Carbon filtration systems
- Reflective wall surfaces
- Low-stress training techniques
- Smaller plant counts with optimized canopies
If the entire setup must work within a rental or shared residential space, our guide to growing cannabis in an apartment goes deeper into ventilation, discretion, equipment noise, odor, and limited-space planning.
Closet Grow Systems
A closet can provide useful environmental separation, but the small air volume also means conditions can deteriorate quickly. Heat accumulates faster, humidity can spike after watering, and unrestricted vertical growth may bring the canopy too close to the light.
Ventilation should therefore be planned before plants fill the available space. The setup needs a clear path for fresh intake air, warm exhaust air, internal circulation, and safe light clearance above the canopy.
Closet systems are particularly popular among beginner growers because they require relatively little space or equipment.
Key closet grow advantages include:
- Natural concealment
- Easier light control
- Compact environmental management
- Lower startup costs
To optimize a closet setup, growers often add:
- Reflective interior lining
- Small ventilation systems
- Carbon filtration
- Compact LED lighting
- Training systems for height control
Closet growing is less about scale and more about maintaining complete environmental consistency inside a compact area. Growers building this type of compact setup can use our detailed guide to growing cannabis in a closet for more specific planning around ventilation, lighting, reflective surfaces, and height control.
Optimizing Indoor Cannabis Growth Rates
Cannabis growth speed is partly genetic, but indoor conditions determine how closely a plant reaches that potential. Weak light, saturated root zones, repeated temperature swings, and poorly timed training can all slow development even when nutrient levels appear adequate.
In practice, faster growth usually comes from removing these bottlenecks rather than pushing plants with excessive fertilizer or light intensity.
Healthy cannabis plants grow quickly when stress is minimized.
Key Growth Acceleration Factors
Several variables strongly influence growth speed:
- Stable light schedules
- Proper nutrient timing
- Root oxygenation
- Temperature consistency
- Balanced humidity levels
- Efficient airflow and CO₂ exchange
Many experienced growers focus heavily on root health because healthy roots directly influence nutrient uptake and overall growth rate.

Environmental instability often slows development more than nutrient deficiencies do. Overwatering, inconsistent temperatures, and poor airflow can all delay growth significantly. If development remains unusually slow, our guide to helping cannabis plants grow faster breaks down the most common limitations involving light, roots, watering, temperature, and plant stress.
Advanced Growth Optimization Techniques
Once the basics are stable, growers sometimes implement advanced optimization methods to improve canopy efficiency and vegetative speed.
These may include:
- Low-stress training (LST)
- Topping and canopy management
- ScrOG systems
- CO₂ supplementation
- Strategic pruning
- Optimized photoperiod management
The goal of growth optimization is not simply to create larger plants, but to create healthier canopies that distribute light more efficiently across all bud sites.
Reducing stress while maximizing light exposure is often the fastest path to accelerated indoor growth.
Managing Cannabis Plant Height Indoors
Final plant height depends on genetics, vegetative duration, light intensity, container size, training, and the amount of stretch that occurs after flowering begins. Indoors, the practical concern is not maximum biological height but whether the canopy can remain within the usable distance between the container and the lighting system.
This is why vertical planning should happen before flowering. A plant that fits comfortably during vegetation may gain substantial height after the light cycle changes, particularly when the cultivar has a strong stretching tendency.
Some strains naturally remain compact while others stretch aggressively during flowering.
Indica vs Sativa Growth Patterns
Indica-dominant strains usually develop:
- Shorter, bushier structures
- Wider node spacing
- Denser canopies
Sativa-dominant strains often produce:
- Taller vertical growth
- Greater flowering stretch
- Longer branch development
This difference is important for indoor growers because excessive vertical growth can quickly overwhelm tents, closets, and apartment systems.
Growers estimating clearance before choosing a tent or switching to flower can use our guide to cannabis plant height for a deeper look at genetics, vegetative time, and flowering stretch.
Indoor Height Management Techniques
Indoor cultivators actively manage plant height using training and environmental strategies such as:
- Low-stress training (LST)
- Topping and pruning
- ScrOG canopy systems
- Pot size management
- Earlier flowering transitions
- Light distance adjustments
Height control becomes especially important in compact grow environments where excessive stretch can place plants dangerously close to lighting systems.
Preventing Overgrowth and Canopy Crowding
Indoor plants can outgrow their available space when vegetative growth continues too long, flowering stretch is underestimated, or branches are allowed to crowd one another without training. The problem is not simply that the plant becomes “too big.” A dense canopy changes the environment around the leaves and flowers.
As branches overlap, light penetration declines and air movement becomes less consistent. Humidity can remain trapped within the interior canopy, lower growth receives less usable light, and routine inspection for pests or disease becomes more difficult.
Risks of Overgrowth
Overgrown cannabis plants commonly develop:
- Reduced light penetration
- Poor airflow within the canopy
- Higher humidity pockets
- Increased mold risk
- Lower-quality lower buds
- Greater pest vulnerability
If you are trying to determine whether a plant has exceeded the capacity of its grow space, our guide to recognizing and correcting overgrown cannabis plants covers the warning signs and practical options in more detail.
Preventing Overgrowth
Effective canopy management usually includes:
- Regular pruning of lower growth
- Strategic branch spacing
- Controlled vegetative duration
- Training techniques for canopy flattening
- Defoliation to improve airflow
Indoor cannabis cultivation is often more about canopy management than plant count. A properly managed canopy distributes light evenly, improves airflow, and creates more consistent bud development across the entire plant.
Building a Successful Indoor Cannabis Environment
One of the biggest lessons experienced indoor growers learn is that cannabis cultivation is not about chasing extremes. Bigger lights, stronger nutrients, or larger plants do not automatically create better harvests.
Healthy indoor cultivation comes from balance.
When temperature, humidity, airflow, lighting, root health, and canopy management work together, cannabis plants can focus their energy on flower production instead of stress recovery.
A stable indoor environment supports:
- Stronger terpene production
- Better cannabinoid development
- Healthier root systems
- Improved resin formation
- More efficient nutrient uptake
- Higher-quality harvests overall
Most cultivation problems begin when one environmental variable falls too far out of balance with the others.
Final Takeaway
Indoor cannabis cultivation is a complete environmental system where every variable influences plant performance.
From grow tents and airflow systems to odor control, lighting, canopy management, and humidity regulation, successful indoor growing depends on maintaining consistency throughout the entire growth cycle.
Whether you are growing in a dedicated grow room, an apartment setup, or a compact closet system, the principles remain the same: reduce stress, optimize environmental stability, and create conditions that allow cannabis plants to thrive naturally.
As you gain experience, you begin to realize that the best indoor growers are not simply growing bigger plants — they are creating better environments.
Alexander Broodryk is a very skilled grower and has been writing about his experiences online for many years. With over 5 years in the Cannabis Industry Alexander is not only engaging with many of his audiences but also informational. Alex has a lot of writings about Cannabis all over online and we are very happy to have him here at The Seed Fair helping to contribute his well thorough content for our website. He is dedicated to educating readers on the latest developments and trends in this rapidly evolving market. Check out his biography under our Author pages at Alexander Broodryk, Author at The Seed Fair.