How to Grow Dutch Treat Cannabis: Complete Grow Guide
May
Growing Dutch Treat successfully starts long before the flowering stage. Like any premium cannabis cultivar, the quality of your harvest depends on selecting stable genetics, creating the right environment, and making good decisions throughout every stage of growth.
Dutch Treat has earned its reputation among growers for producing dense, resin-coated flowers with exceptional aroma, strong vigor, and reliable yields. While many growers consider it forgiving enough for those with some cultivation experience, maximizing its full potential requires careful attention to lighting, humidity, nutrients, and canopy management.
Unlike some modern hybrids that demand constant adjustments, Dutch Treat responds well to consistency. Stable temperatures, proper airflow, balanced feeding, and gentle plant training are usually rewarded with healthy plants that produce impressive harvests both indoors and outdoors.
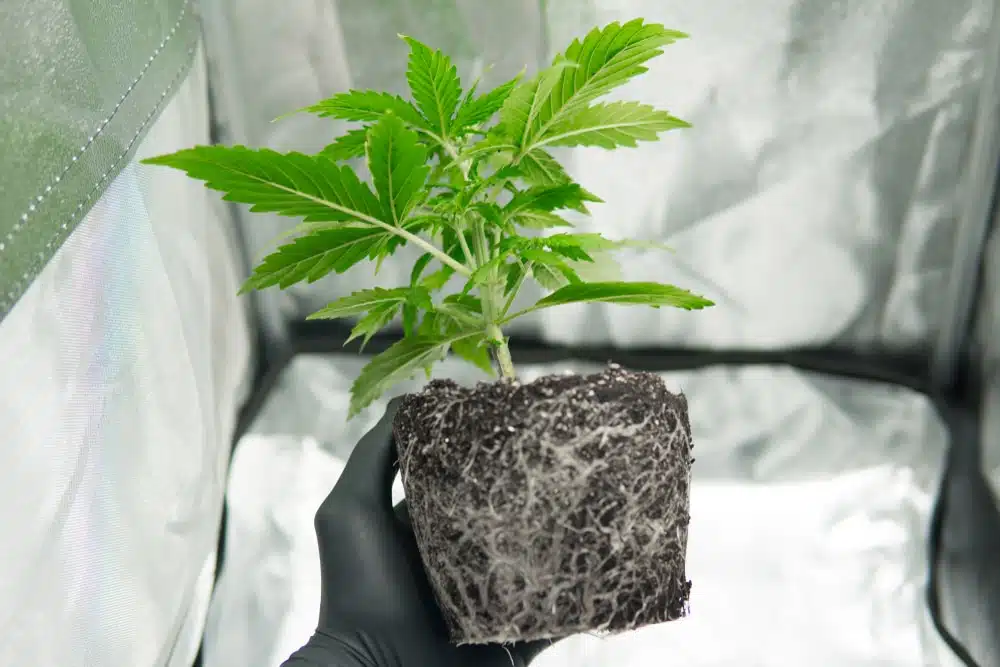
If you’re planning your next grow, starting with vigorous, stable genetics makes every stage easier. Our Dutch Treat Feminized Cannabis Seeds are selected for reliable germination, strong growth, and consistent performance, giving growers an excellent foundation before the first seed even sprouts.
Whether you’re growing in soil, coco coir, or hydroponics, this guide walks you through everything you need to know—from germination to harvest—to help you produce healthy plants with exceptional quality flowers.
Dutch Treat Grow Summary
| Feature | Dutch Treat |
|---|---|
| Strain Type | Indica-dominant Hybrid |
| Grow Difficulty | Easy to Moderate |
| Indoor / Outdoor | Excellent for both |
| Flowering Time | 8–9 Weeks |
| Harvest Outdoors | Late September to Early October |
| Indoor Height | 3–5 ft |
| Outdoor Height | Up to 6 ft |
| Indoor Yield | High |
| Outdoor Yield | High |
| Climate | Warm, Dry, Moderate Humidity |
| Best Growing Medium | Soil, Coco, Hydroponics |
| Recommended Training | LST, SOG, Light Defoliation |
| Beginner Friendly | Yes, with basic growing knowledge |
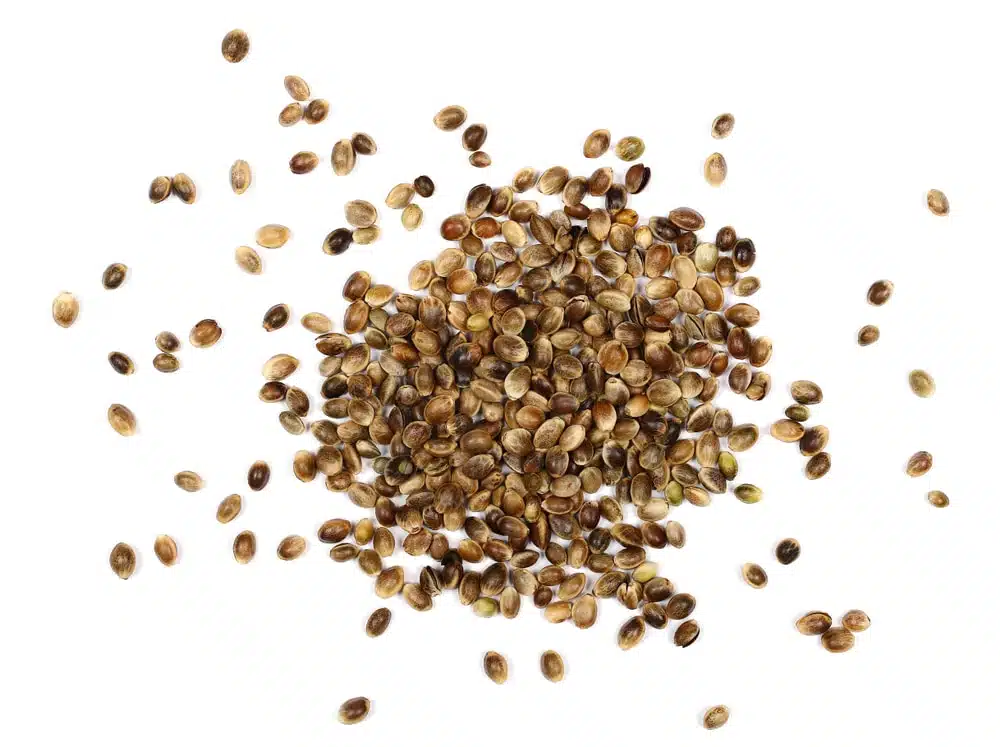
Is Dutch Treat Easy to Grow?
Dutch Treat is often recommended as an excellent strain for growers looking to move beyond beginner genetics without taking on an overly demanding cultivar.
Its reputation comes from its combination of strong genetics, vigorous growth, and natural resistance to many common cultivation problems. While no cannabis strain is completely maintenance-free, Dutch Treat generally tolerates minor mistakes better than many modern dessert hybrids.
One reason growers enjoy this variety is its adaptability. It performs well in several growing environments, including indoor grow tents, outdoor gardens, greenhouses, and hydroponic systems. As long as temperature, humidity, lighting, and nutrition remain reasonably stable, Dutch Treat typically develops into a healthy, productive plant.
The strain also responds well to training techniques that help maximize canopy development. Growers using Low Stress Training (LST) or Sea of Green (SOG) methods often report improved light penetration, more flowering sites, and larger overall harvests.
That said, Dutch Treat is not a strain you should simply ignore after planting. Like all cannabis varieties, it performs best when environmental conditions remain consistent throughout its life cycle.
Experienced growers often notice that Dutch Treat rewards attention to detail with:
- Strong vegetative growth
- Thick branching
- Excellent trichome production
- Dense flowers
- High-quality terpene development
- Consistent yields
For growers willing to monitor their environment and maintain a steady feeding schedule, Dutch Treat can become one of the more rewarding strains to cultivate.
Dutch Treat Growing Characteristics
Understanding how Dutch Treat naturally grows allows you to make better cultivation decisions throughout the entire grow cycle.
Rather than producing extremely compact indica plants, Dutch Treat develops into a medium-to-tall hybrid with vigorous branching and excellent lateral growth. This structure allows light to penetrate deep into the canopy when properly trained.
Healthy plants typically produce:
- Thick central stems
- Numerous secondary branches
- Medium internodal spacing
- Dense flower clusters
- Heavy resin production
- Strong terpene development during late flowering
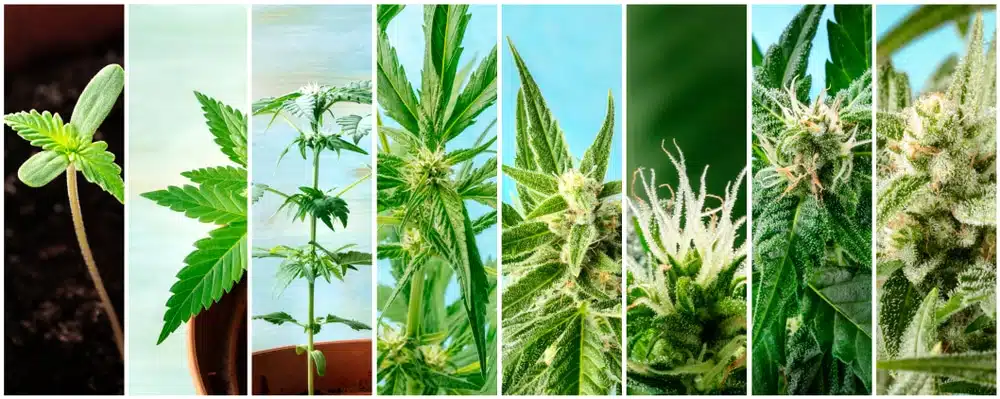
As flowering progresses, buds begin stacking aggressively along each branch, eventually producing dense colas coated in sticky trichomes.
Because of these heavy flowers, many growers choose to support branches during late flowering using stakes, bamboo supports, or trellis netting.
Growth Pattern
Dutch Treat generally develops with a naturally bushy canopy while still maintaining moderate vertical growth.
During the vegetative stage, expect rapid leaf production and healthy side branching. Once flowering begins, the plant typically stretches moderately before shifting most of its energy into flower production.
Compared to many sativa-dominant cultivars, Dutch Treat remains much easier to manage indoors while still producing excellent yields.
Flowering Characteristics
One reason Dutch Treat has remained popular for decades is its relatively efficient flowering period.
Most phenotypes finish flowering in approximately:
- 8–9 weeks indoors
- Late September to early October outdoors
During flowering you’ll notice:
- Rapid bud stacking
- Heavy trichome coverage
- Increasing terpene production
- Dense flower formation
- Strong aroma development
Proper airflow becomes increasingly important during this period because dense flowers can retain moisture if humidity is allowed to climb too high.
Aroma During Cultivation
One aspect many first-time growers underestimate is just how aromatic Dutch Treat becomes during flowering.
By the middle of bloom, plants often produce noticeable scents combining:
- Sweet fruit
- Pine
- Earth
- Herbs
- Citrus
- Floral notes
Indoor growers should plan ventilation accordingly. A quality carbon filter helps manage odor while also improving overall air circulation throughout the grow space.
Growing Dutch Treat Indoors
Dutch Treat performs exceptionally well indoors because growers can precisely control the environmental conditions that influence plant health, terpene production, and final yields.
Indoor cultivation allows you to manage temperature, humidity, airflow, lighting, and feeding throughout every stage of growth. This consistency is one of the main reasons many growers achieve excellent harvests with this variety.
When grown indoors under stable conditions, Dutch Treat typically develops a broad canopy filled with evenly spaced flowering sites that respond extremely well to gentle training techniques.
Lighting
Lighting is one of the biggest factors influencing final yield.
Dutch Treat appreciates strong, consistent light throughout its entire life cycle.
Most growers achieve excellent results using high-quality full-spectrum LED grow lights because they offer:
- Lower operating temperatures
- Reduced electricity consumption
- Excellent light penetration
- Strong resin production
Maintain approximately:
Vegetative Stage
- 18 hours light
- 6 hours darkness
Flowering Stage
- 12 hours light
- 12 hours uninterrupted darkness
Maintaining a consistent lighting schedule helps reduce unnecessary plant stress while encouraging healthy growth.
As plants mature, adjust fixture height regularly to avoid excessive stretching or light burn.
Temperature
Dutch Treat prefers a stable environment rather than dramatic temperature swings.
Aim for:
Vegetative Growth
- 70–80°F (21–27°C)
Flowering
- 68–78°F (20–26°C)
Night temperatures should remain only slightly cooler.
Large fluctuations between daytime and nighttime temperatures can slow growth and unnecessarily stress the plant.
Stable temperatures also encourage stronger terpene preservation during late flowering.
Humidity
Humidity requirements change throughout the life cycle.
Seedling Stage
70–75%
Vegetative Stage
55–65%
Early Flower
45–50%
Late Flower
40–45%
Lower humidity during flowering significantly reduces the likelihood of mold, mildew, and bud rot while helping flowers mature properly.
Digital hygrometers make monitoring humidity much easier and allow you to react before problems develop.
Airflow and Ventilation
Good airflow is one of the easiest ways to improve overall plant health.
Constant air movement helps:
- Strengthen stems
- Regulate leaf temperature
- Reduce humidity pockets
- Discourage pests
- Prevent fungal diseases
A proper indoor setup should include:
- Oscillating circulation fans
- Inline exhaust fan
- Passive or active intake
- Carbon filter for odor control
Avoid pointing powerful fans directly at plants for extended periods, as excessive wind can cause unnecessary stress.
Instead, create gentle air movement throughout the entire canopy.
Container Size
Dutch Treat develops an extensive root system when given adequate space.
Many indoor growers find success using:
- 3-gallon pots for smaller grow tents
- 5-gallon fabric pots for average grows
- 7-gallon containers for maximum plant size
Fabric pots are particularly popular because they improve root-zone oxygen availability while helping prevent overwatering.
Starting plants directly in their final container also minimizes transplant stress and allows uninterrupted root development during vegetative growth.
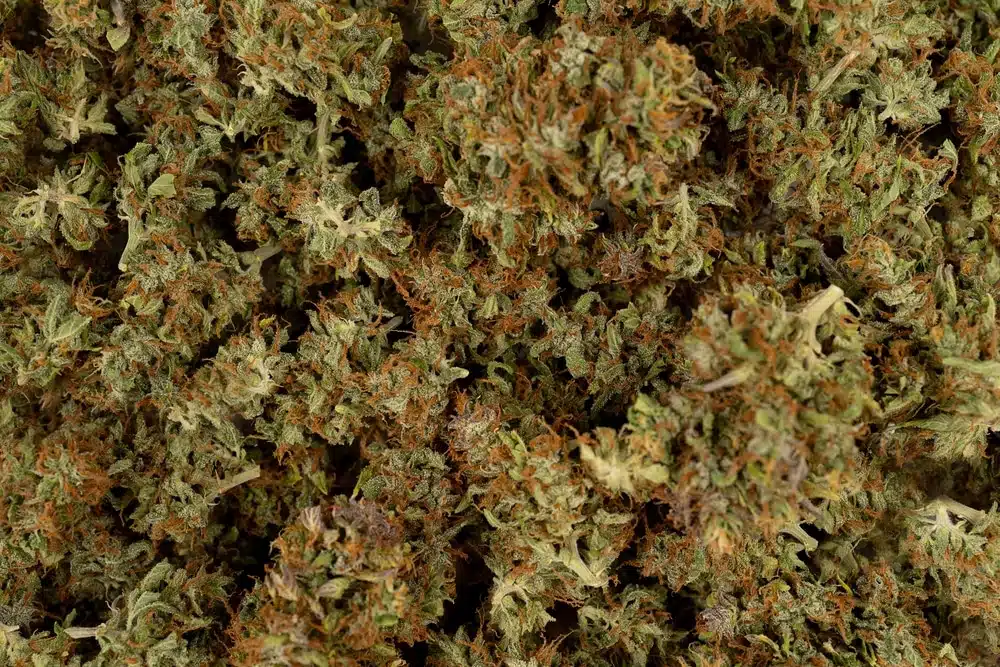
Growing Dutch Treat Outdoors
Dutch Treat is a versatile cultivar that performs extremely well outdoors when grown in the right climate. While indoor growers benefit from complete environmental control, outdoor cultivation allows Dutch Treat to fully express its vigorous growth, producing larger plants with excellent yields when conditions remain favorable.
Like many indica-dominant hybrids, Dutch Treat prefers long sunny days, warm temperatures, and relatively low humidity during flowering. Growers in Mediterranean-style climates often achieve exceptional results, although the strain also performs well in many temperate regions with a reasonably dry autumn.
One advantage of outdoor cultivation is the unrestricted root development that comes from growing directly in the ground. Healthy root systems generally translate into larger plants, stronger branching, and increased flower production.
Choosing the Best Location
The location you choose has a significant impact on your final harvest.
Dutch Treat thrives in areas that receive plenty of direct sunlight throughout the day.
Ideally, your grow location should provide:
- 6–8 hours of direct sunlight daily
- Excellent airflow
- Good soil drainage
- Protection from strong winds
- Minimal standing humidity
Avoid planting near areas where moisture tends to collect, as excessive humidity increases the likelihood of fungal diseases during flowering.
Climate
Dutch Treat performs best in climates with:
- Warm daytime temperatures
- Mild evenings
- Low to moderate humidity
- Plenty of sunshine
Ideal outdoor temperatures range between:
70–85°F (21–29°C)
Consistently cool or damp conditions during flowering may increase the chances of:
- Bud rot
- Powdery mildew
- Slow flower development
If you live in an area with frequent autumn rain, monitor flowers carefully during the final weeks before harvest.
Soil Preparation
Healthy soil builds healthy plants.
Before planting outdoors, prepare your growing area by incorporating organic matter that improves both drainage and nutrient availability.
Many experienced growers prefer soil containing:
- Compost
- Worm castings
- Perlite
- Peat moss
- High-quality organic topsoil
This combination provides excellent aeration while retaining enough moisture to support vigorous root development.
The goal is loose, well-draining soil that allows roots to expand freely throughout the season.
Watering Outdoors
Outdoor watering depends heavily on climate, soil composition, rainfall, and plant size.
Rather than watering on a fixed schedule, monitor the soil itself.
A good rule is to water when the top few inches of soil begin to dry.
Deep watering encourages roots to grow downward instead of remaining close to the surface.
During hot summer periods, mature Dutch Treat plants may require significantly more water than young vegetative plants.
Avoid frequent shallow watering, which often produces weaker root systems.
Feeding Outdoor Plants
As Dutch Treat increases in size, its nutritional demands also increase.
Throughout vegetative growth, plants require higher nitrogen levels to support vigorous leaf and branch production.
Once flowering begins, nutrient requirements gradually shift toward phosphorus and potassium to support heavy bud development.
Many growers achieve excellent results by using quality organic fertilizers supplemented with compost teas or microbial inoculants that improve nutrient availability.
Rather than feeding aggressively, monitor your plants and adjust based on their appearance.
Healthy green foliage, vigorous growth, and steady flower production usually indicate a balanced feeding program.
Best Growing Medium for Dutch Treat
Dutch Treat adapts well to several growing methods.
Each medium offers unique advantages depending on your experience level and cultivation goals.
Growing in Soil
For most growers, soil remains the easiest and most forgiving option.
Quality living soil naturally buffers pH fluctuations while supporting beneficial microorganisms that improve nutrient uptake.
Benefits include:
- Easier nutrient management
- Better moisture retention
- Excellent terpene development
- Greater forgiveness for beginners
Many experienced cultivators still prefer soil because of the complex aromas it often produces.
Growing in Coco Coir
Coco coir offers faster growth while maintaining some of the forgiveness associated with soil.
Advantages include:
- Excellent oxygen availability
- Rapid root development
- Faster vegetative growth
- Precise nutrient control
Because coco contains very few nutrients naturally, growers must provide complete feeding programs from early vegetative growth onward.
Growing Hydroponically
Hydroponic cultivation offers the fastest growth rates but requires significantly more attention.
Dutch Treat performs exceptionally well in hydro systems when environmental conditions remain stable.
Benefits include:
- Accelerated growth
- Faster nutrient uptake
- Excellent yields
- Large flowers
However, hydroponic systems require close monitoring of:
- pH
- EC
- Water temperature
- Oxygen levels
Small mistakes can affect plants much faster than in soil.
For growers new to Dutch Treat, soil or coco generally provides a smoother learning curve.
Nutrient Schedule
Dutch Treat responds best to steady nutrition rather than excessive feeding.
One mistake many growers make is assuming more fertilizer equals larger yields.
In reality, overfeeding often creates nutrient burn, salt buildup, and slower growth.
Seedling Stage
During the first two weeks, seedlings require very little nutrition.
High-quality soil usually contains sufficient nutrients until early vegetative growth begins.
If growing in coco or hydro, introduce nutrients gradually at low strength.
Vegetative Stage
Nitrogen becomes the primary nutrient during vegetative growth.
Focus on promoting:
- Strong stems
- Healthy leaves
- Rapid branching
- Root development
Calcium and magnesium are also important during this period, especially under LED lighting.
Early Flower
Once flowering begins, gradually reduce nitrogen while increasing phosphorus and potassium.
This transition encourages:
- Flower initiation
- Strong bud formation
- Healthy trichome production
Avoid switching nutrient formulas too suddenly.
Gradual transitions generally produce healthier plants.
Mid to Late Flower
As buds mature, Dutch Treat shifts nearly all its energy toward flower production.
During this period, focus on:
- Potassium
- Phosphorus
- Stable pH
- Consistent watering
Avoid making major environmental changes late in flowering.
Plants appreciate consistency.
Training Dutch Treat for Bigger Yields
Dutch Treat naturally develops excellent branching, making it highly responsive to gentle plant training.
Instead of allowing one dominant cola to receive most of the light, training encourages multiple flowering sites across the canopy.
The result is often:
- Better light penetration
- Larger harvests
- More even bud development
- Improved airflow
Low Stress Training (LST)
LST remains one of the best training methods for Dutch Treat.
By gently bending and securing branches outward, growers expose additional bud sites to direct light.
Benefits include:
- Minimal plant stress
- Increased canopy size
- Better light distribution
- Higher yields
Begin LST once plants develop several healthy nodes during vegetative growth.
Topping
Dutch Treat generally tolerates topping well when performed early.
Removing the main growing tip encourages multiple dominant branches rather than a single central cola.
Only top healthy plants during vegetative growth.
Avoid topping once flowering begins.
Sea of Green (SOG)
Dutch Treat works exceptionally well in Sea of Green gardens.
Growing multiple smaller plants close together allows growers to:
- Reduce vegetative time
- Improve canopy uniformity
- Maximize indoor space
- Increase production per square foot
Many commercial growers prefer this method because of its efficiency.
Light Defoliation
Dutch Treat develops dense foliage.
Removing selected fan leaves improves:
- Air circulation
- Light penetration
- Humidity control
Only remove leaves that block important flowering sites.
Over-defoliation can reduce plant vigor, so moderation is important.
Flowering Time
Dutch Treat generally flowers in:
8–9 weeks indoors
Outdoor harvest typically occurs:
Late September through early October
Flowering speed depends on:
- Phenotype
- Environment
- Lighting
- Nutrition
- Overall plant health
Healthy plants maintained under stable conditions typically finish on schedule while producing dense, resin-coated flowers.
Expected Yield
Dutch Treat has earned a reputation as a productive cultivar.
Indoor growers commonly harvest:
12–18 ounces per square meter
Outdoor plants frequently produce:
12–18 ounces per plant
Actual yields depend on several factors, including:
- Genetics
- Lighting intensity
- Container size
- Root health
- Training methods
- Nutrient management
- Environmental consistency
Rather than chasing maximum yield, focus on growing healthy plants throughout every stage.
Healthy plants almost always produce better harvests than plants pushed too aggressively.
Harvesting Dutch Treat
After weeks of careful cultivation, proper harvesting is what determines whether all of your hard work pays off. Harvest too early, and you sacrifice potency, terpene development, and yield. Harvest too late, and THC begins degrading while the effects become heavier and more sedative.
Instead of harvesting based solely on flowering time, use the maturity of the plant itself as your guide.
Dutch Treat is typically ready for harvest after 8–9 weeks of flowering indoors, while outdoor plants usually finish between late September and early October, depending on climate and phenotype.
Signs Dutch Treat Is Ready for Harvest
Rather than relying only on the calendar, monitor several indicators before cutting your plants.
Trichomes
The most accurate way to judge harvest readiness is by examining the trichomes using a jeweler’s loupe or digital microscope.
Generally, you’ll see:
- Clear trichomes – Plant is still immature.
- Cloudy or milky trichomes – Peak cannabinoid production.
- Amber trichomes – THC begins converting into other cannabinoids, producing heavier effects.
Many growers harvest when approximately:
- 80–90% of trichomes are cloudy
- 10–20% are amber
This balance often provides the combination of potency, flavor, and overall effect that Dutch Treat is known for.
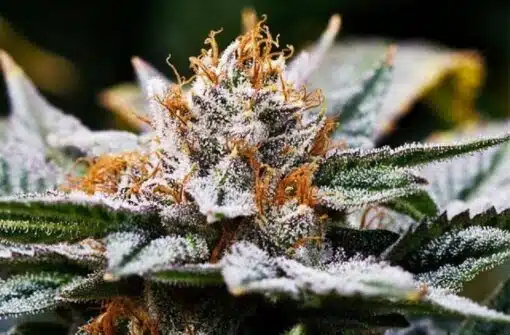
Pistils
The pistils also provide useful clues.
Early flowering:
- Bright white
- Standing upright
Near harvest:
- Dark orange or brown
- Curled inward
- Mostly receded into the flowers
While pistils alone shouldn’t determine harvest timing, they help confirm what the trichomes are showing.
Fan Leaves
As harvest approaches, many of the larger fan leaves naturally begin fading from green to yellow.
This is normal.
Healthy plants naturally use stored nutrients during the final weeks as flowers finish maturing.
Don’t mistake normal fading for a nutrient deficiency late in flower.
How to Harvest Dutch Treat
Once your plants reach maturity, harvest carefully to preserve the resin glands covering the flowers.
Using sharp pruning shears:
- Cut entire branches individually.
- Handle buds gently.
- Avoid squeezing or rubbing flowers.
- Leave enough stem to simplify hanging during drying.
Many growers prefer harvesting early in the morning or immediately before lights turn on for indoor plants, when terpene evaporation is often at its lowest.
Take your time.
Harvesting carefully helps preserve the appearance, aroma, and resin production that Dutch Treat is known for.
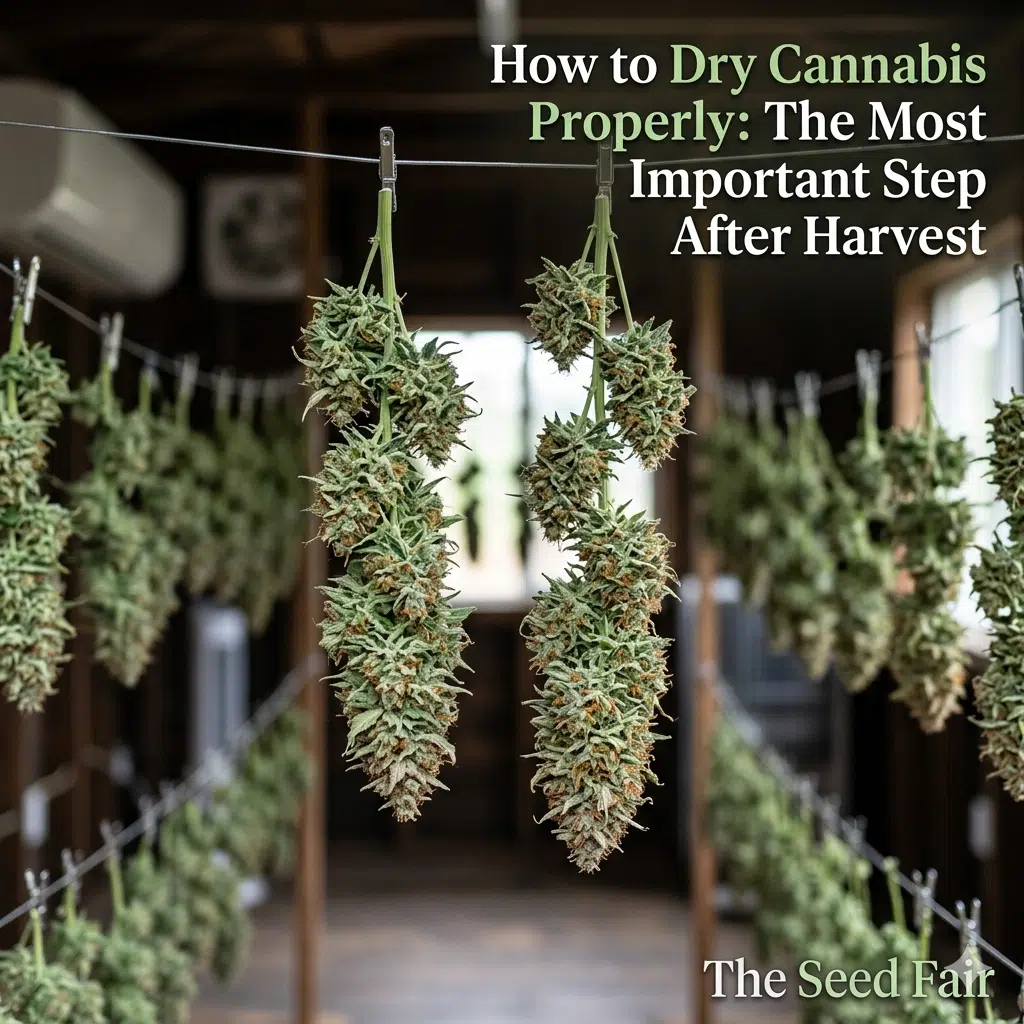
Drying Dutch Treat Properly
Drying is one of the most overlooked stages of cannabis cultivation.
Even perfectly grown flowers can lose much of their aroma and smoothness if dried too quickly.
The goal is a slow, controlled drying process.
Ideal Drying Conditions
Aim for:
Temperature:
60–68°F (15–20°C)
Humidity:
55–60% RH
Dark room
Gentle air circulation
Good ventilation
Avoid directing fans directly at hanging flowers.
Instead, move air throughout the room while allowing buds to dry naturally.
Under ideal conditions, drying usually takes:
7–14 days
The stems should snap instead of bend before curing begins.
Curing Dutch Treat
Many growers think harvest is the finish line.
In reality, curing is where Dutch Treat develops much of its final aroma, smoothness, and flavor.
Proper curing allows excess moisture to leave the flowers gradually while preserving cannabinoids and terpenes.
Place dried buds inside airtight glass jars.
For the first two weeks:
Open jars once or twice daily for 10–15 minutes.
This process—often called “burping”—allows fresh air to circulate while preventing excess moisture buildup.
After two weeks:
Reduce burping frequency to every few days.
Many experienced growers continue curing for:
4–8 weeks
Longer curing often produces noticeably smoother smoke and richer terpene profiles.
Common Dutch Treat Growing Problems
Although Dutch Treat is considered relatively hardy, no cannabis strain is immune to cultivation problems.
Fortunately, most issues can be prevented through good environmental management.
Bud Rot
Dense flowers naturally retain more moisture.
If humidity remains too high during flowering, botrytis (bud rot) can develop inside the buds before becoming visible externally.
Prevention includes:
- Lower humidity below 50% during flowering.
- Maintain excellent airflow.
- Remove crowded foliage.
- Inspect flowers regularly.
Powdery Mildew
Powdery mildew appears as a white, dusty coating on leaves.
It spreads rapidly in environments with:
- High humidity
- Poor airflow
- Crowded canopies
Maintaining proper spacing and ventilation greatly reduces the risk.
Spider Mites
Spider mites are among the most common cannabis pests.
Signs include:
- Tiny yellow speckles
- Fine webbing
- Slowed growth
Inspect the underside of leaves regularly, especially during vegetative growth.
Early detection makes treatment significantly easier.
Nutrient Burn
Dutch Treat generally prefers consistent feeding rather than aggressive nutrient programs.
Too much fertilizer may cause:
- Brown leaf tips
- Curling leaves
- Salt buildup
- Slower growth
If nutrient burn appears, reduce feeding strength before adding more nutrients.
Healthy roots always outperform excessive fertilizer.
Overwatering
One of the most common mistakes among newer growers.
Symptoms include:
- Drooping leaves
- Slow growth
- Yellowing foliage
- Poor root development
Instead of watering on a schedule, allow the growing medium to partially dry before watering again.
Healthy roots require oxygen just as much as they require water.
Frequently Asked Questions
Is Dutch Treat a good strain for beginners?
Yes.
Dutch Treat is considered one of the more forgiving hybrid strains for growers with basic cultivation knowledge. It responds well to stable environments and tolerates minor mistakes better than many modern hybrids.
How long does Dutch Treat flower?
Most phenotypes finish flowering in approximately 8–9 weeks indoors.
Outdoor growers generally harvest between late September and early October, depending on local climate.
Does Dutch Treat grow well indoors?
Absolutely.
Indoor cultivation allows growers to control temperature, humidity, lighting, and airflow, helping Dutch Treat produce dense, resin-rich flowers with consistent quality.
Should I top Dutch Treat?
Yes.
Healthy vegetative plants respond well to topping, Low Stress Training (LST), and Sea of Green (SOG) methods.
These techniques improve canopy development and often increase overall yields.
Does Dutch Treat need a lot of nutrients?
Not necessarily.
Dutch Treat performs best with balanced feeding throughout its life cycle.
Overfeeding is more likely to reduce growth than improve it.
Monitor your plants and adjust nutrient levels based on their appearance rather than following an aggressive schedule.
Final Thoughts
Dutch Treat has remained popular for decades because it offers something many growers appreciate: dependable performance.
With stable genetics, a manageable flowering time, excellent resin production, and consistently high yields, it’s a cultivar that rewards careful cultivation without becoming overly demanding.
Whether you’re growing indoors under LED lighting or outdoors in a warm, sunny climate, success comes from maintaining stable environmental conditions throughout every stage of growth. Consistent temperatures, proper humidity, balanced nutrition, and gentle training techniques will almost always outperform aggressive growing methods.
If you’re planning your first Dutch Treat grow—or simply looking to improve your next harvest—starting with high-quality genetics gives you the best chance of success.
Our Dutch Treat Feminized Cannabis Seeds are selected for strong germination, vigorous growth, and reliable performance, making them an excellent choice for growers looking to produce healthy plants with exceptional flower quality.
As your plants develop, remember that no single technique determines a successful harvest. It’s the combination of good genetics, patience, observation, and consistent care that allows Dutch Treat to reach its full potential.

Alexander Broodryk is a very skilled grower and has been writing about his experiences online for many years. With over 5 years in the Cannabis Industry Alexander is not only engaging with many of his audiences but also informational. Alex has a lot of writings about Cannabis all over online and we are very happy to have him here at The Seed Fair helping to contribute his well thorough content for our website. He is dedicated to educating readers on the latest developments and trends in this rapidly evolving market. Check out his biography under our Author pages at Alexander Broodryk, Author at The Seed Fair.