Complete Guide to Cannabis Seeds, Germination & Early Plant Development
Jun
Cannabis cultivation always begins in the same place: the seed. Long before environmental control, nutrient schedules, or training techniques become relevant, the entire outcome of a grow is already being influenced by genetics and seed quality. For many growers, this is the stage that determines whether a plant becomes strong, stable, and productive — or whether problems begin before the plant even breaks the surface.
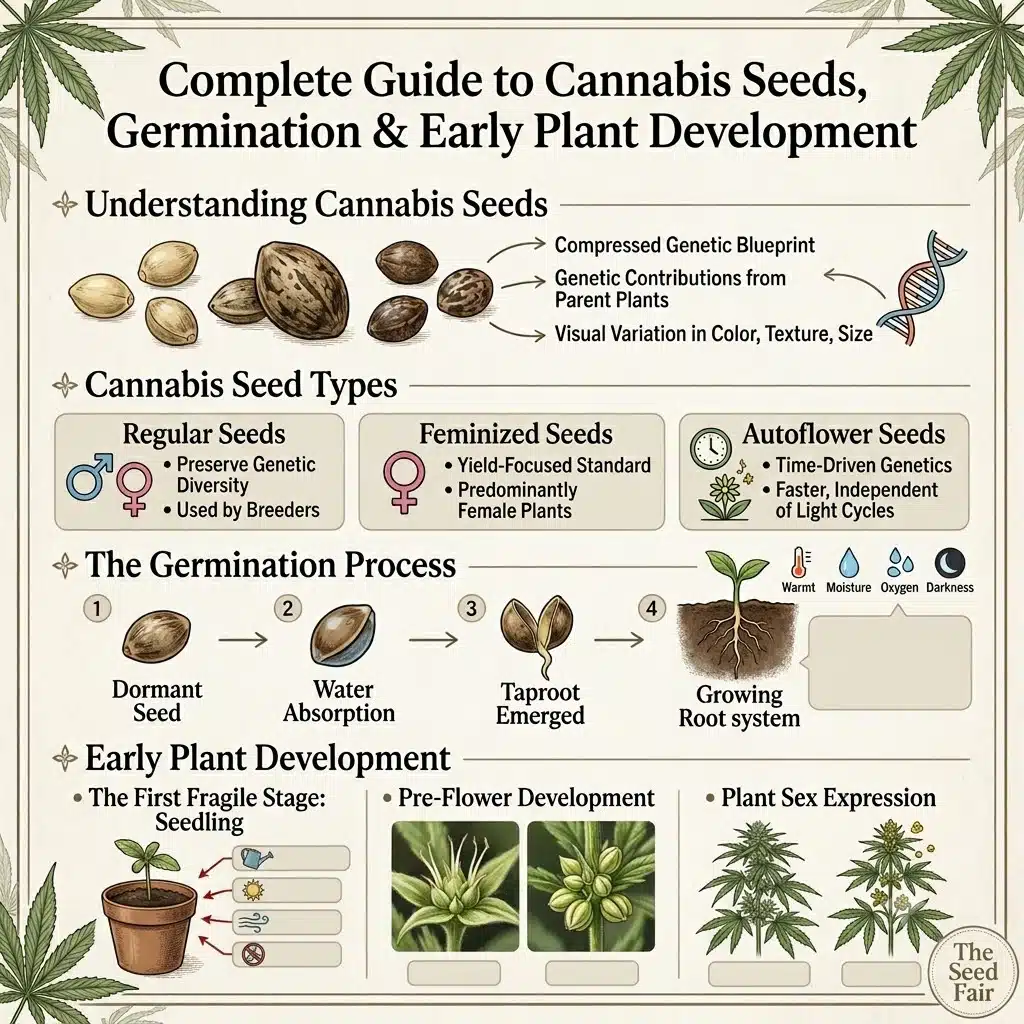
Cannabis seeds are often treated as simple starting material, but in reality they represent a highly compressed genetic blueprint. Inside each seed is a combination of traits that determine plant structure, cannabinoid potential, resilience, flowering behavior, and even susceptibility to stress responses such as hermaphroditism. Because of this, seed selection and germination are not just early steps in cultivation — they are foundational decisions that shape everything that follows.
This guide breaks down cannabis seeds in a practical, grower-focused way. It covers how seeds form, why genetics matter, how germination actually works, what determines sex expression, and how early plant development influences long-term success.
Understanding Cannabis Seeds as the Starting Point of Genetics
A cannabis seed is the result of sexual reproduction between two parent plants, carrying genetic contributions from both. While this sounds simple, the expression of those genes is anything but predictable. Even within stable strains, there is always variation in how traits present themselves once the plant begins growing.
This is why experienced growers often say that cultivation success begins not with nutrients or lighting, but with selection. The seed determines the ceiling of the plant’s potential before it ever responds to environmental conditions.
Genetics influence:
- Plant structure (tall vs compact growth)
- Flower density and bud formation
- Cannabinoid expression (THC, CBD balance)
- Terpene profile and aroma intensity
- Stress tolerance and recovery speed
- Flowering time and stretch behavior
Environmental conditions still matter, but they operate within the boundaries set by genetics. A strong environment cannot fully fix weak genetics, but strong genetics can often outperform moderate environments when handled correctly.
Why Cannabis Seeds Look Identical (And Why Sex Cannot Be Identified Early)
One of the most persistent misconceptions in cultivation is the idea that cannabis seed appearance can reveal plant sex or quality traits. In practice, cannabis seeds are visually indistinguishable in terms of male or female outcome.
Seeds may vary in:
- Color (light tan to dark brown)
- Surface texture (smooth or slightly mottled)
- Size (influenced by parent plant health)
- Patterning (striping in some strains)
However, none of these characteristics reliably indicate sex, potency, or yield potential.
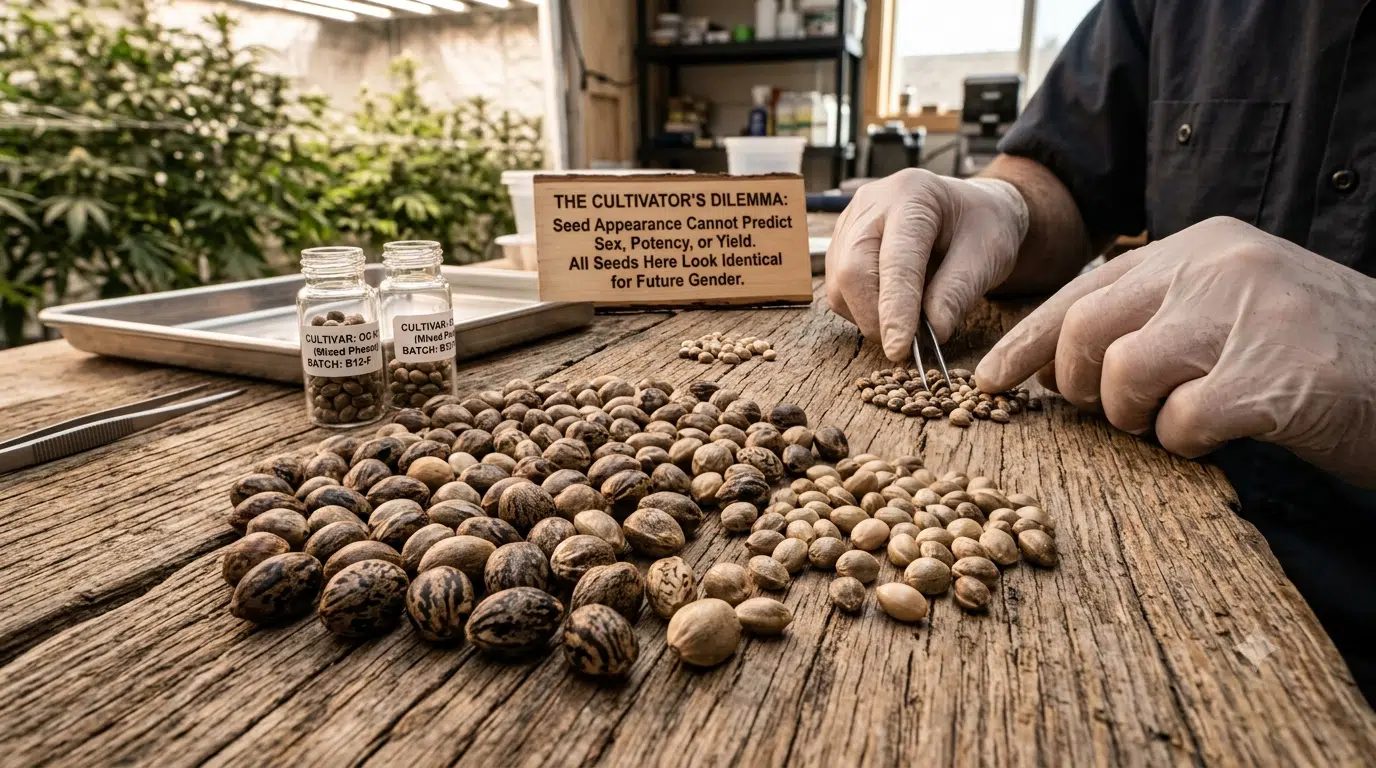
Plant sex cannot be reliably identified from the external appearance of a cannabis seed. Visible sex characteristics develop later as the plant matures and begins forming pre-flowers at the nodes. At the seed stage, color, size, striping, and surface texture do not provide a dependable way to predict whether a plant will later express male or female reproductive structures.
This is why professional cultivation relies on controlled genetics (such as feminized seeds) rather than visual sorting.
Cannabis Seed Types and Their Practical Differences
Cannabis seeds are generally categorized into three main types, each serving a different cultivation strategy.
Regular Seeds (Genetic Diversity Seeds)
Regular seeds are the most natural form of cannabis reproduction, producing a mix of male and female plants.
These seeds are primarily used by breeders because they preserve genetic diversity and allow for controlled crossbreeding.
From a cultivation perspective, regular seeds require more attention because growers must identify and separate male plants early to avoid unwanted pollination.
Feminized Seeds (Yield-Focused Cultivation Standard)
Feminized seeds are bred to produce predominantly female plants, which are responsible for flower production.
In practical cultivation, feminized seeds have become the standard for growers focused on cannabinoid yield rather than breeding projects.
They reduce uncertainty and allow more efficient use of grow space, especially in indoor environments where every plant must contribute to harvest output.
However, feminized genetics can be more sensitive to stress, which makes environmental stability important throughout the grow cycle.
Autoflower Seeds (Time-Driven Genetics)
Autoflowering seeds behave differently from traditional photoperiod cannabis because they are not dependent on light cycles to initiate flowering.
Instead, they transition based on internal genetic timing.
This makes them faster and more predictable in terms of total grow time, but less flexible for training or extended vegetative development.
Because autoflowers have limited time to recover from stress, early-stage handling becomes even more critical.
Germination: Where Growth Actually Begins
Germination is the process where a dormant cannabis seed activates and begins transforming into a living plant. While it appears simple, it is actually a highly sensitive biological transition that depends on moisture, oxygen, temperature, and time.
Inside the seed, enzymes activate once moisture penetrates the outer shell. This triggers internal energy reserves to break dormancy and initiate root emergence.
A successful germination process typically requires:
- Stable warmth
- Moist (not saturated) conditions
- Oxygen availability
- Darkness or low light exposure
When these conditions align, the seed splits and a taproot emerges. This root becomes the foundation of the entire plant’s nutrient uptake system.
Even small inconsistencies at this stage can result in weak root development, which often leads to slower growth later in the vegetative stage.
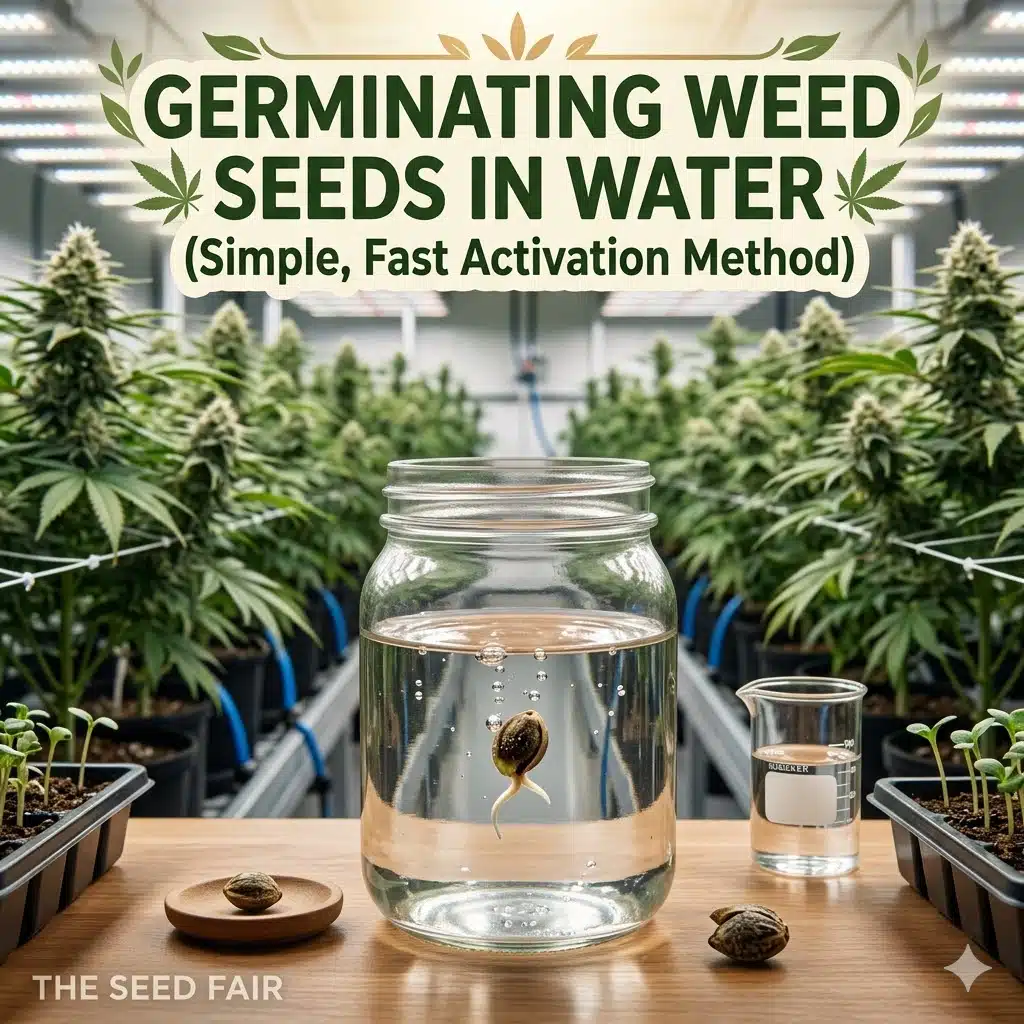
Growers who want a step-by-step breakdown of the process can use our guide to germinating cannabis seeds, which covers preparation, moisture management, early root emergence, and the transition into planting.
Even small inconsistencies at this stage can result in weak root development, which often leads to slower growth later in the vegetative stage.
If a seed fails to open or produces no visible root after an extended period, the cause may involve seed viability, temperature, excess moisture, insufficient moisture, or oxygen availability. Our cannabis seed germination troubleshooting guide covers the most common reasons seeds fail to germinate and what can still be checked before the seed is discarded.
The First Critical Stage: Seedling Development
Once a seed has germinated, it enters the seedling phase — one of the most fragile stages in the entire lifecycle.
At this point, the plant is not yet capable of strong nutrient uptake and relies heavily on its initial energy reserves and environmental stability.
After planting, emergence time can vary with planting depth, temperature, moisture, seed vigor, and the growing medium. Our guide to how long cannabis seeds take to break soil explains what growers can reasonably expect after planting and when delayed emergence may indicate a problem.
Seedlings are especially sensitive to:
- Overwatering
- Excess light intensity
- Low humidity
- Temperature fluctuations
- Poor airflow balance
The starting method also varies by grower. Some begin by soaking seeds in water before transferring them once germination begins, while others choose to plant cannabis seeds directly in soil and avoid handling the emerging taproot. Each approach creates different moisture, timing, and handling considerations.
The root system is still developing, meaning any stress experienced during this phase can have long-term consequences on plant structure and vigor.
Growers often underestimate how much early stability influences final yield potential. A weak start rarely results in a strong finish.
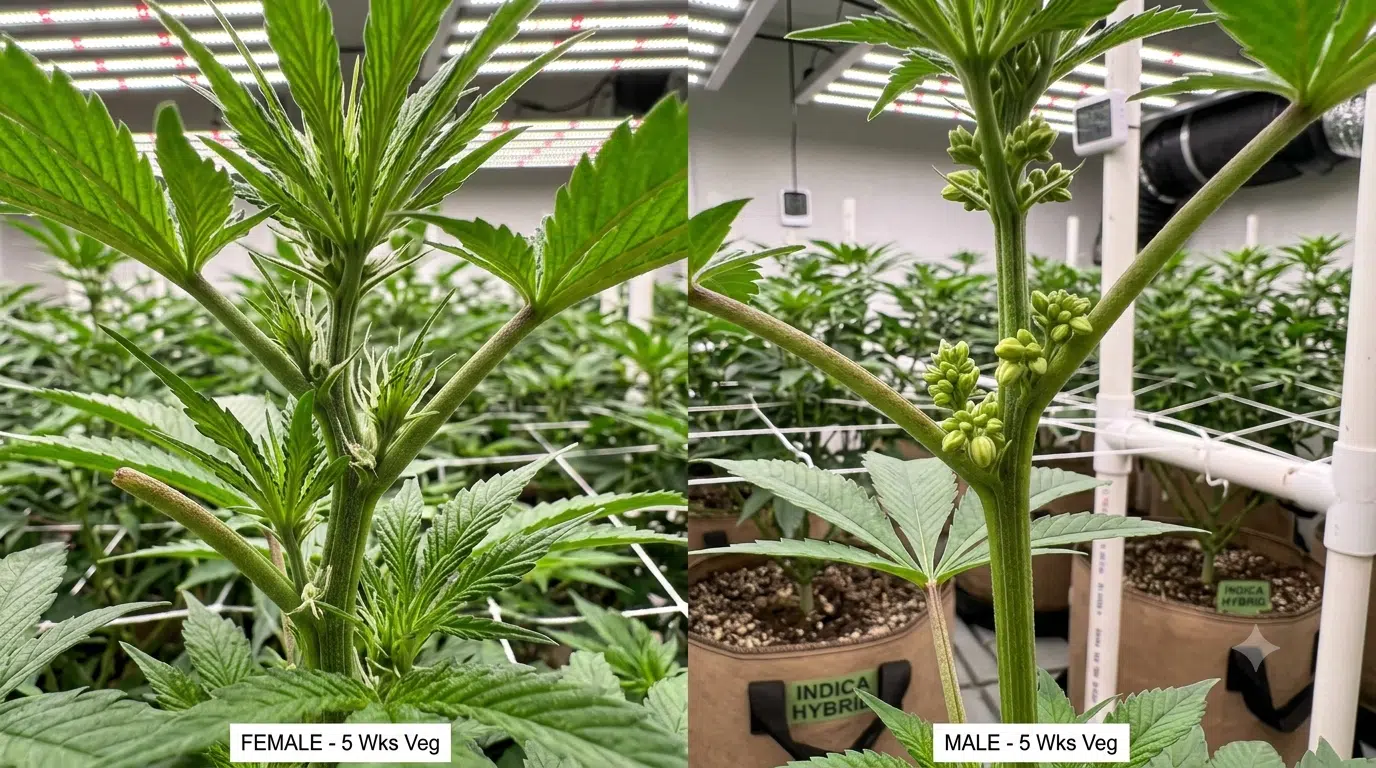
Early Plant Sex Expression and Pre-Flower Development
Cannabis plants do not reveal their sex at the seed stage. Instead, sex expression begins during early vegetative growth when the plant starts forming pre-flowers at the nodes.
These structures eventually develop into either pollen sacs (male) or pistils (female).
Timing varies depending on genetics and growing conditions, but most plants begin showing sex characteristics within a few weeks after entering vigorous vegetative growth.
This stage is crucial for growers working with regular seeds, as early identification allows removal of male plants before pollination occurs.
For feminized seeds, this stage is still important because stress during early development can occasionally trigger hermaphroditic expression in unstable conditions.
Male, Female, and Hermaphrodite Expression in Cannabis Plants
Cannabis is a dioecious species, meaning it can produce distinct male and female plants. However, under certain conditions, plants may also develop both reproductive structures.
Female Plants
Female plants are the primary focus of most cultivation because they produce resin-rich flowers containing cannabinoids and terpenes.
Male Plants
Male plants produce pollen and do not develop significant flower material. Their primary role is genetic contribution in breeding programs.
Hermaphrodites
Hermaphroditic plants develop both male and female reproductive organs, often as a stress response.
This can occur due to environmental instability such as:
- Heat stress
- Light cycle disruption
- Nutrient imbalance
- Physical damage
Hermaphroditism is particularly important in seed production systems because it can lead to self-pollination and unstable genetics in future generations.
Seed formation does not always require a separate male plant to be present. Under certain circumstances, pollen-producing structures can develop on female plants, creating the possibility of self-pollination or pollination within an otherwise female crop. Our guide to how female cannabis plants can produce seeds without male plants explains these pathways in greater detail.
Feminized Seeds and Genetic Stability
Feminized seeds were developed to improve cultivation efficiency by removing uncertainty around plant sex. They are typically produced by inducing female plants to produce pollen, which is then used to fertilize other female plants.
This process results in seeds that overwhelmingly produce female plants.
Feminized seeds offer clear advantages for growers who want to reduce the likelihood of male plants occupying cultivation space. Genetic stability still depends on the quality of the breeding line, and plants with a predisposition toward intersex expression may be more likely to show reproductive instability under severe or repeated stress.
Because of this, growers often prioritize environmental consistency when working with feminized genetics to reduce the risk of hermaphroditic expression.
Seed Quality and Germination Success Rates
Not all cannabis seeds perform equally. Germination success depends on both genetics and seed viability.
High-quality seeds typically show:
- Firm structure under light pressure
- Darker coloration with natural patterning
- Resistance to cracking before germination
- Faster and more consistent sprouting times
Lower quality seeds may still germinate, but often produce weaker seedlings or inconsistent growth patterns.

This is why experienced growers prioritize seed sourcing as much as cultivation technique.
Cloning vs Seeds: Why Seeds Still Matter
While cloning allows growers to replicate genetics, seeds remain essential for introducing new traits and maintaining genetic diversity.
Seeds represent genetic variation, while clones represent genetic repetition.
Both have value, but seeds are the starting point of all cultivation systems. Even the most advanced cloning operations depend on strong seed stock at the beginning of the genetic cycle.
Without seeds, long-term strain development and improvement would not be possible.
How Early Seed Decisions Influence Final Yield
One of the most overlooked aspects of cultivation is how early decisions compound over time. A strong seed leads to a strong seedling, which leads to a stable vegetative structure, which ultimately determines flowering potential.
Weak or unstable seeds often create cascading problems:
- Uneven growth patterns
- Reduced nutrient efficiency
- Increased stress sensitivity
- Lower bud density during flowering
This is why professional growers often focus heavily on starting material quality rather than trying to correct problems later in the cycle.
Final Takeaway
Cannabis cultivation begins long before the plant is visible. It begins at the seed level, where genetics, stability, and viability determine the entire trajectory of growth.
Understanding cannabis seeds is not just about germination — it is about understanding the foundation of plant biology and how early-stage decisions influence everything that follows.
Whether growing for yield, quality, or genetic preservation, the seed remains the most important input in the entire cultivation process.
Strong grows don’t start in the tent.
They start in the seed.
Alexander Broodryk is a very skilled grower and has been writing about his experiences online for many years. With over 5 years in the Cannabis Industry Alexander is not only engaging with many of his audiences but also informational. Alex has a lot of writings about Cannabis all over online and we are very happy to have him here at The Seed Fair helping to contribute his well thorough content for our website. He is dedicated to educating readers on the latest developments and trends in this rapidly evolving market. Check out his biography under our Author pages at Alexander Broodryk, Author at The Seed Fair.